Overview
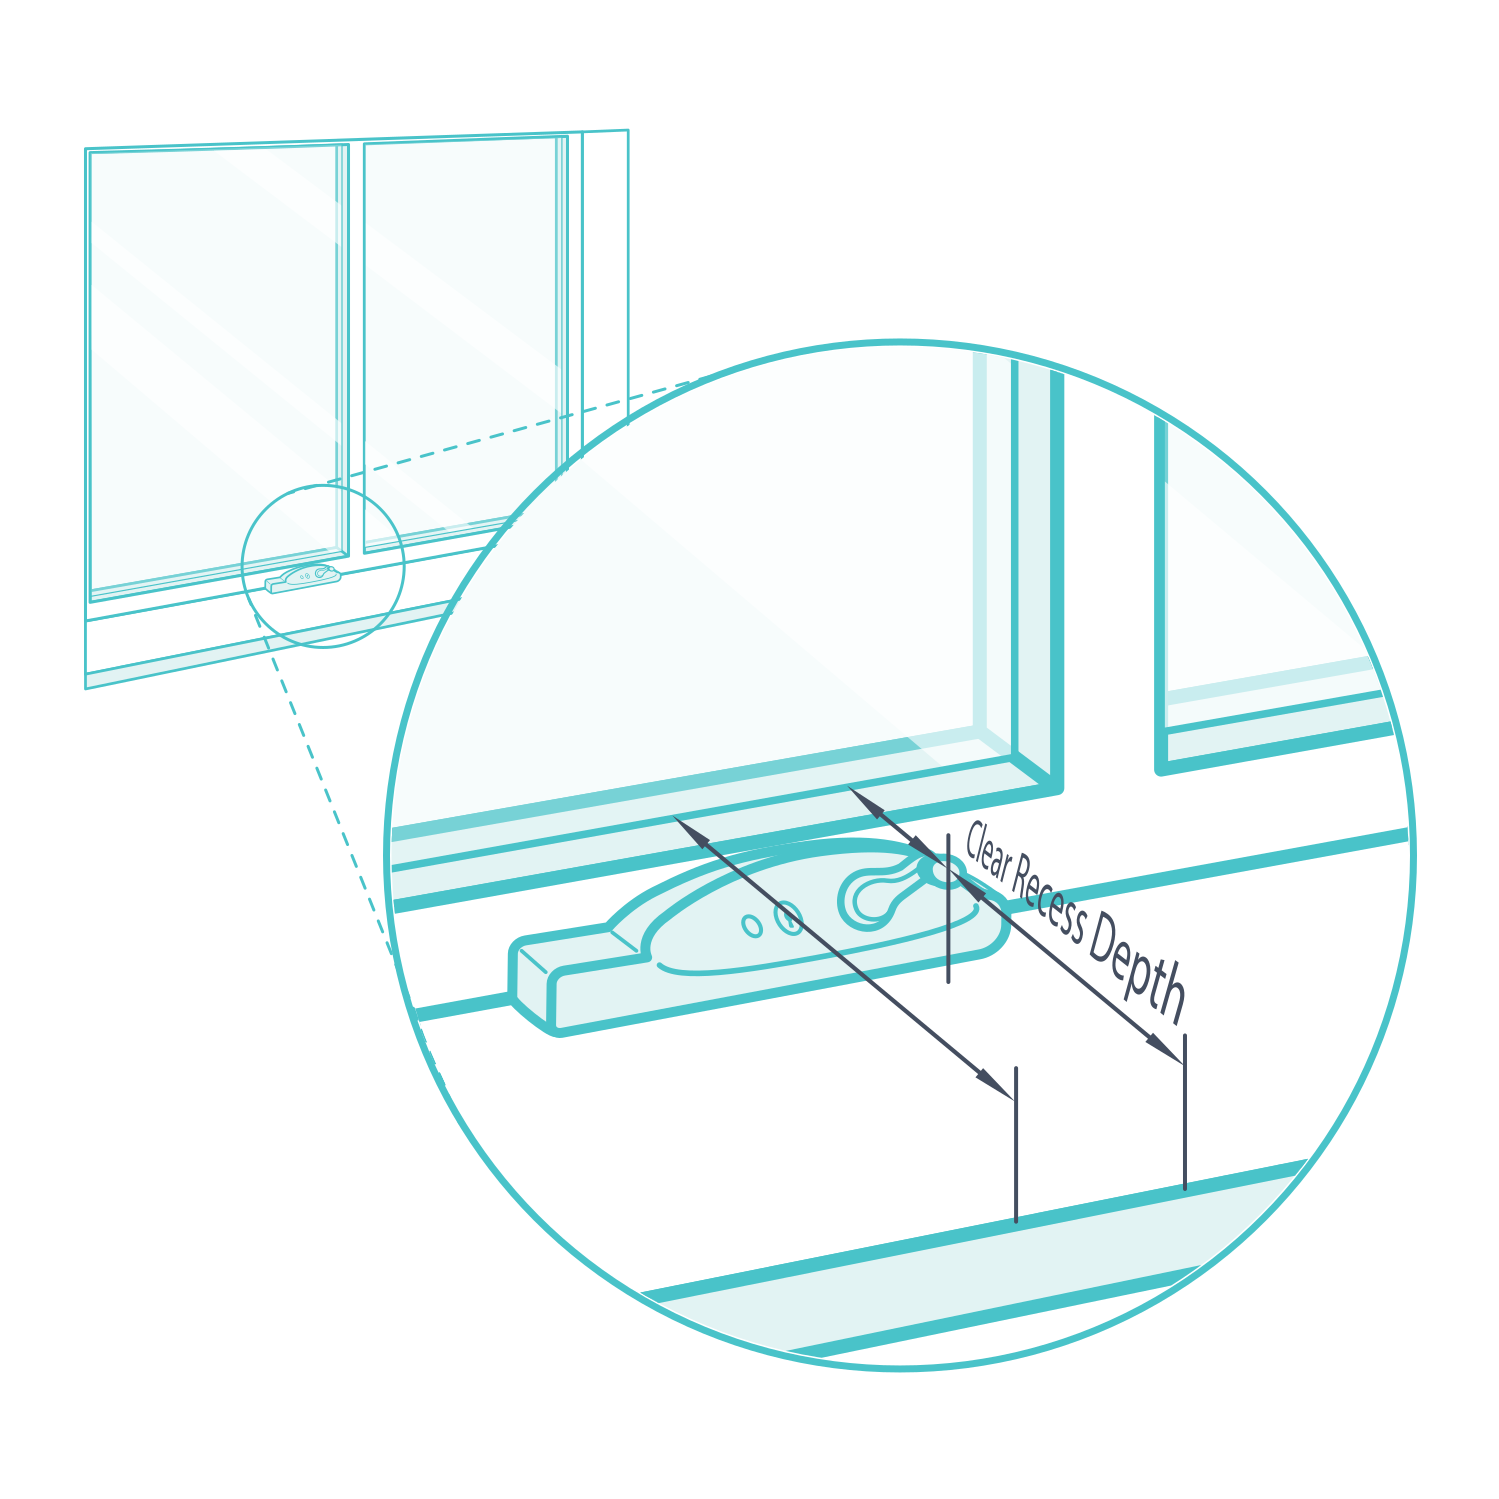
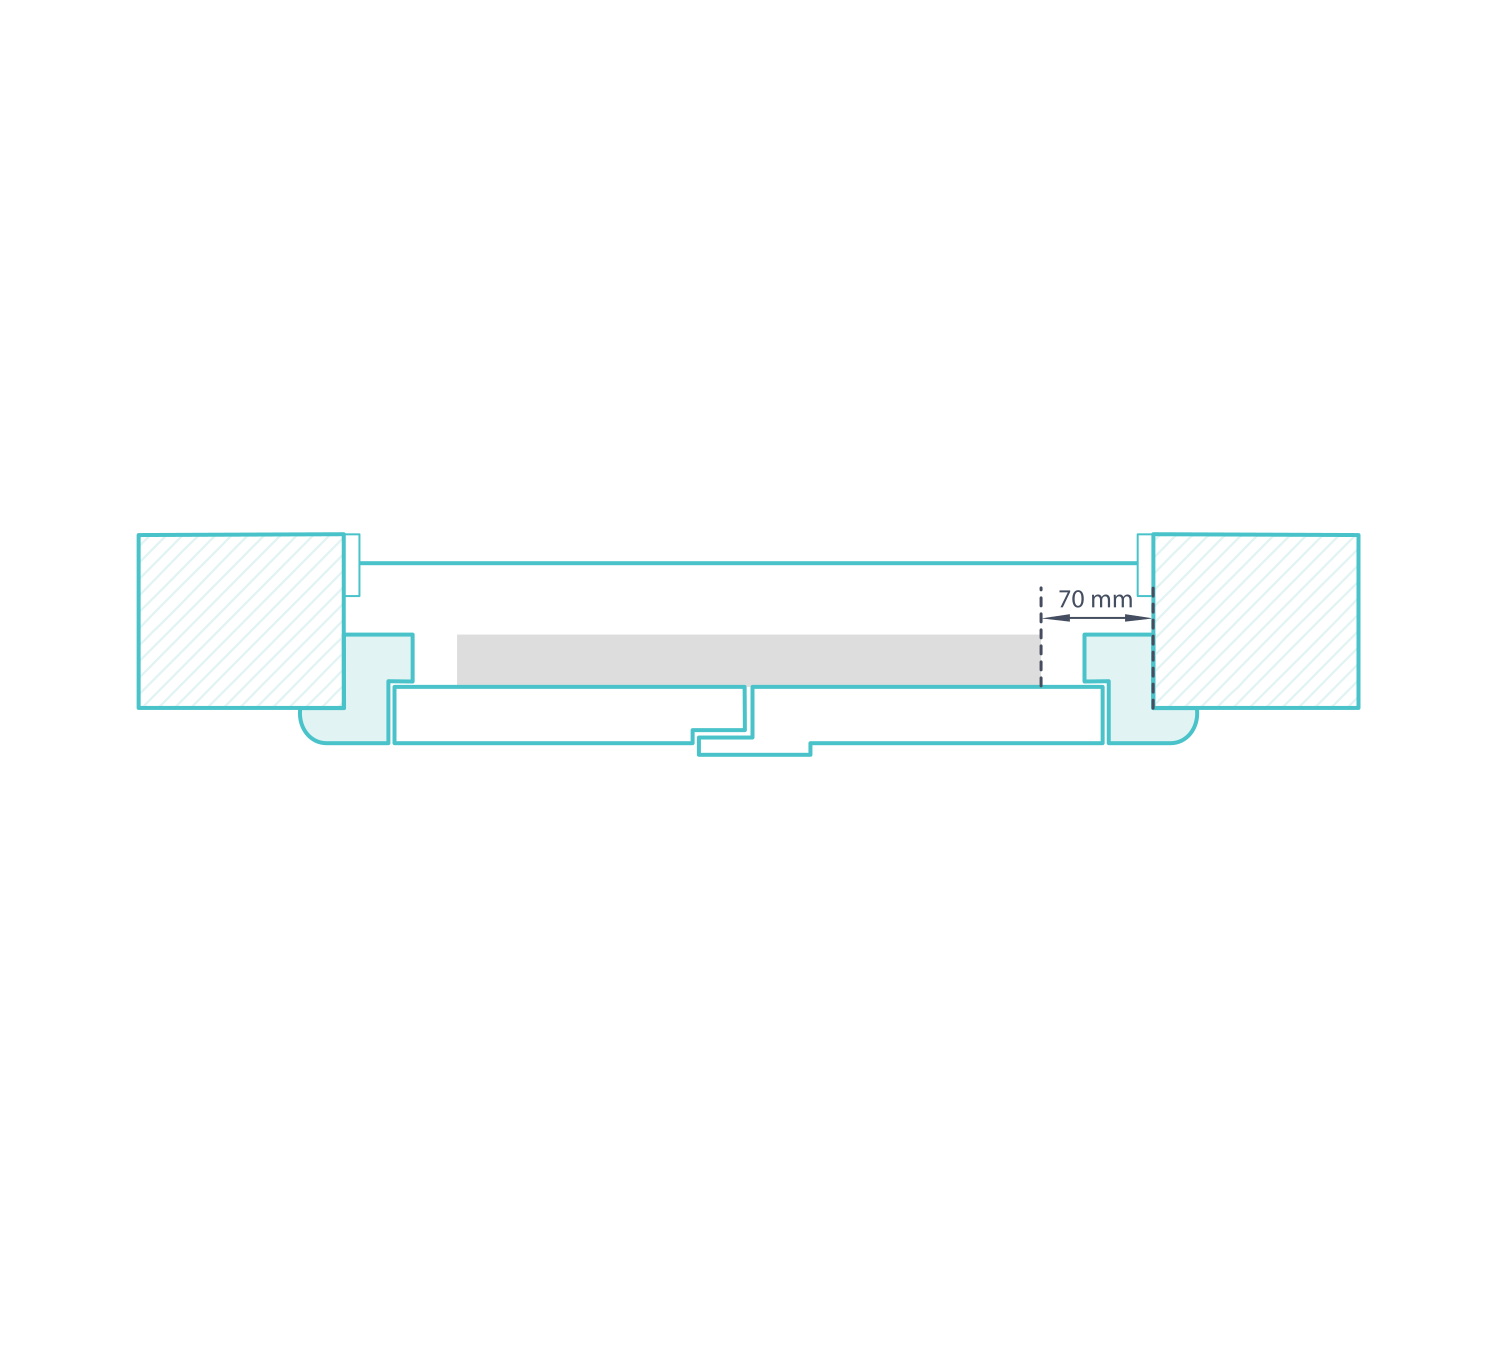
Start with the shallowest space between the recess front and any handle, winder, lock, screen or sash. A 70 mm clear recess is a useful initial check, but smaller clearances need the detailed frame, rail and blade checks below. The obstruction's location matters as much as its projection.
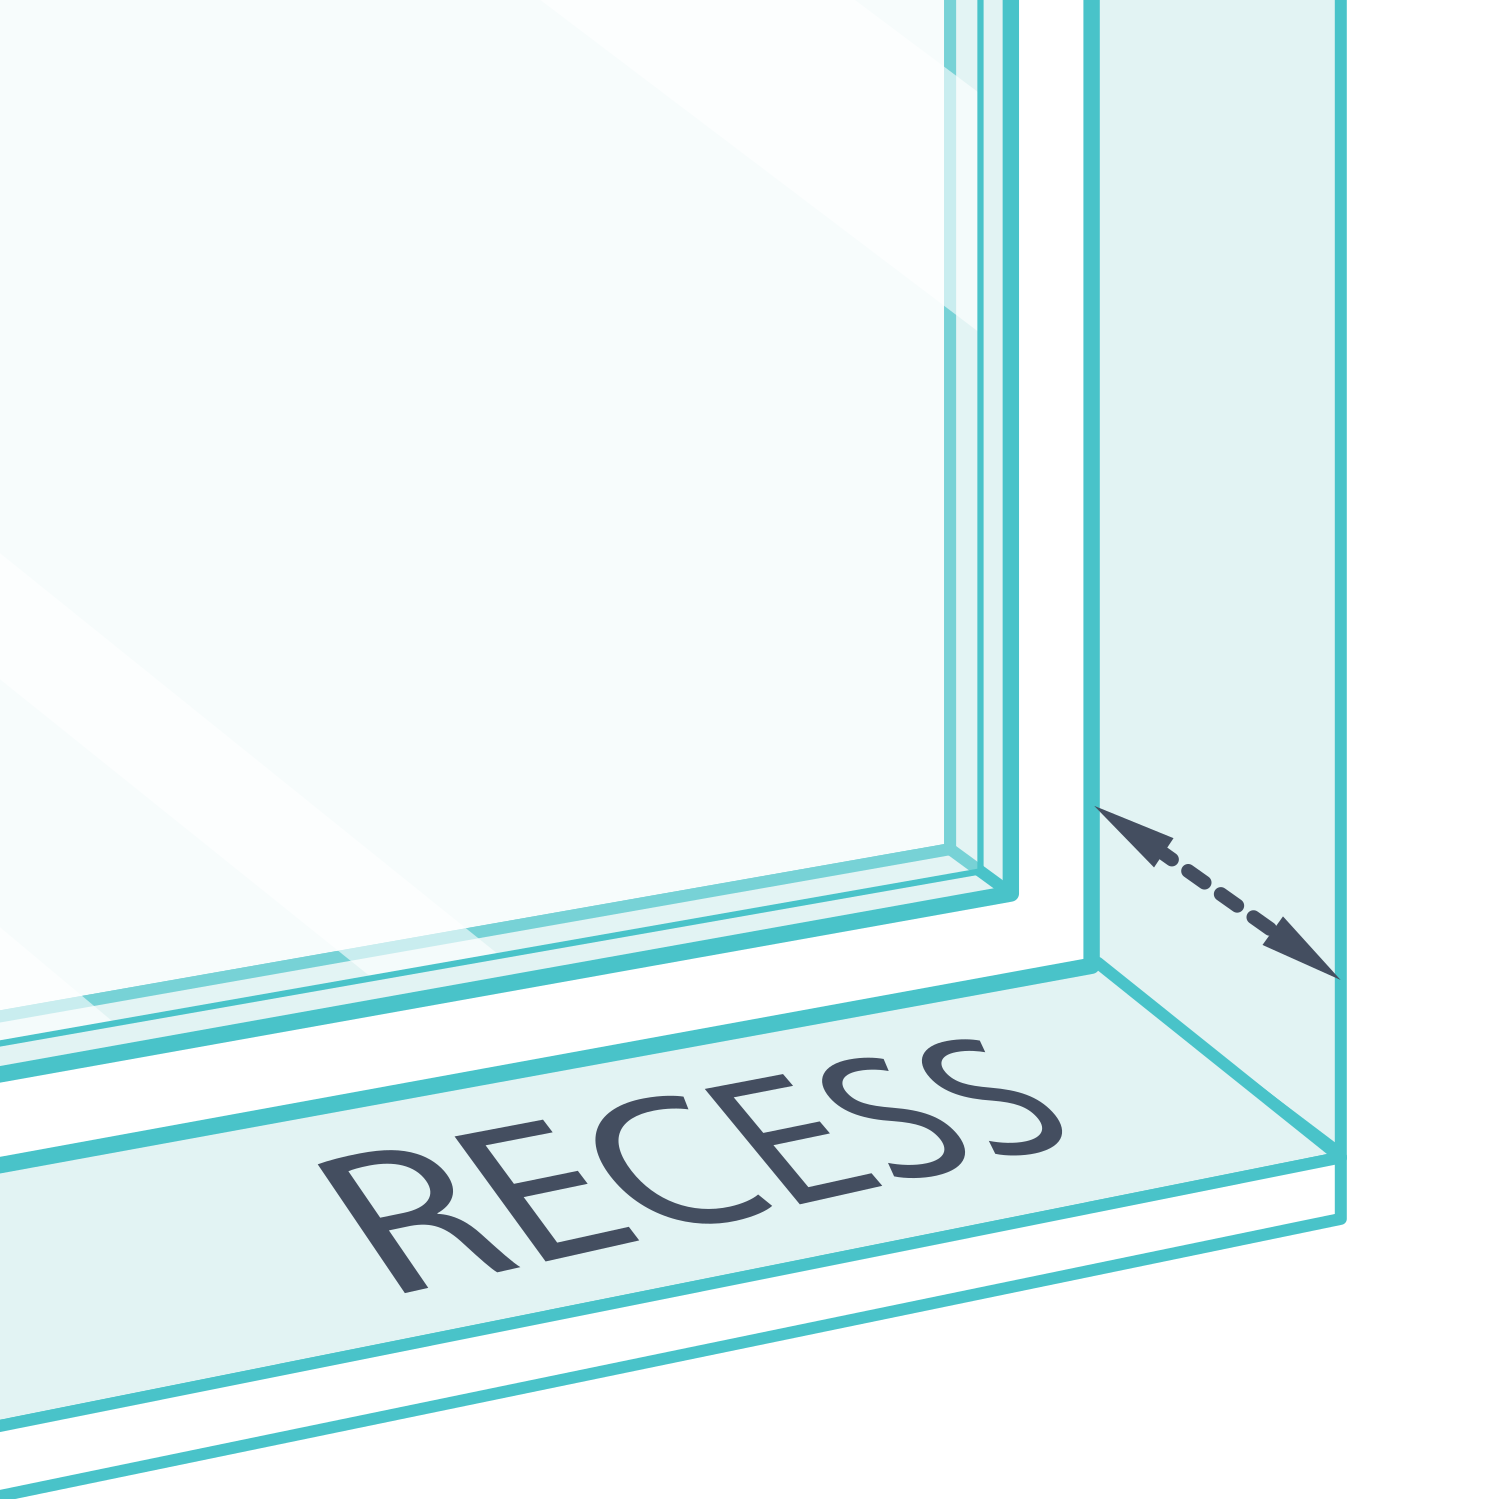
Find the front reference point
Use the room-side front edge of the recess as the reference plane. Measure inward from that same plane at every checking position; changing the starting surface gives inconsistent clearance figures.
Examples of obstructions
Look for window winders, locks, security fittings, handles, keys, screens and opening sashes. Include anything that projects into the area where the frame, rails or blades will sit.
Measure to the first obstruction
Stop the depth measurement at the first obstruction the shutter could touch. This gives the clear space available. A deeper measurement to the glass is not usable if a handle or screen occupies part of it.
Check several locations
Check top, middle and bottom on both sides. Record the smallest clear depth and the location of each obstruction. A recess may taper or contain hardware at only one height.
Operate the window
Open the window and operate its handles or winders while checking the proposed shutter position. Moving hardware must stay clear too. If available depth is below 70 mm or fittings enter the recess, use the frame-specific obstruction checks before committing to an inside mount.
How much clearance do I need for an inside mount?
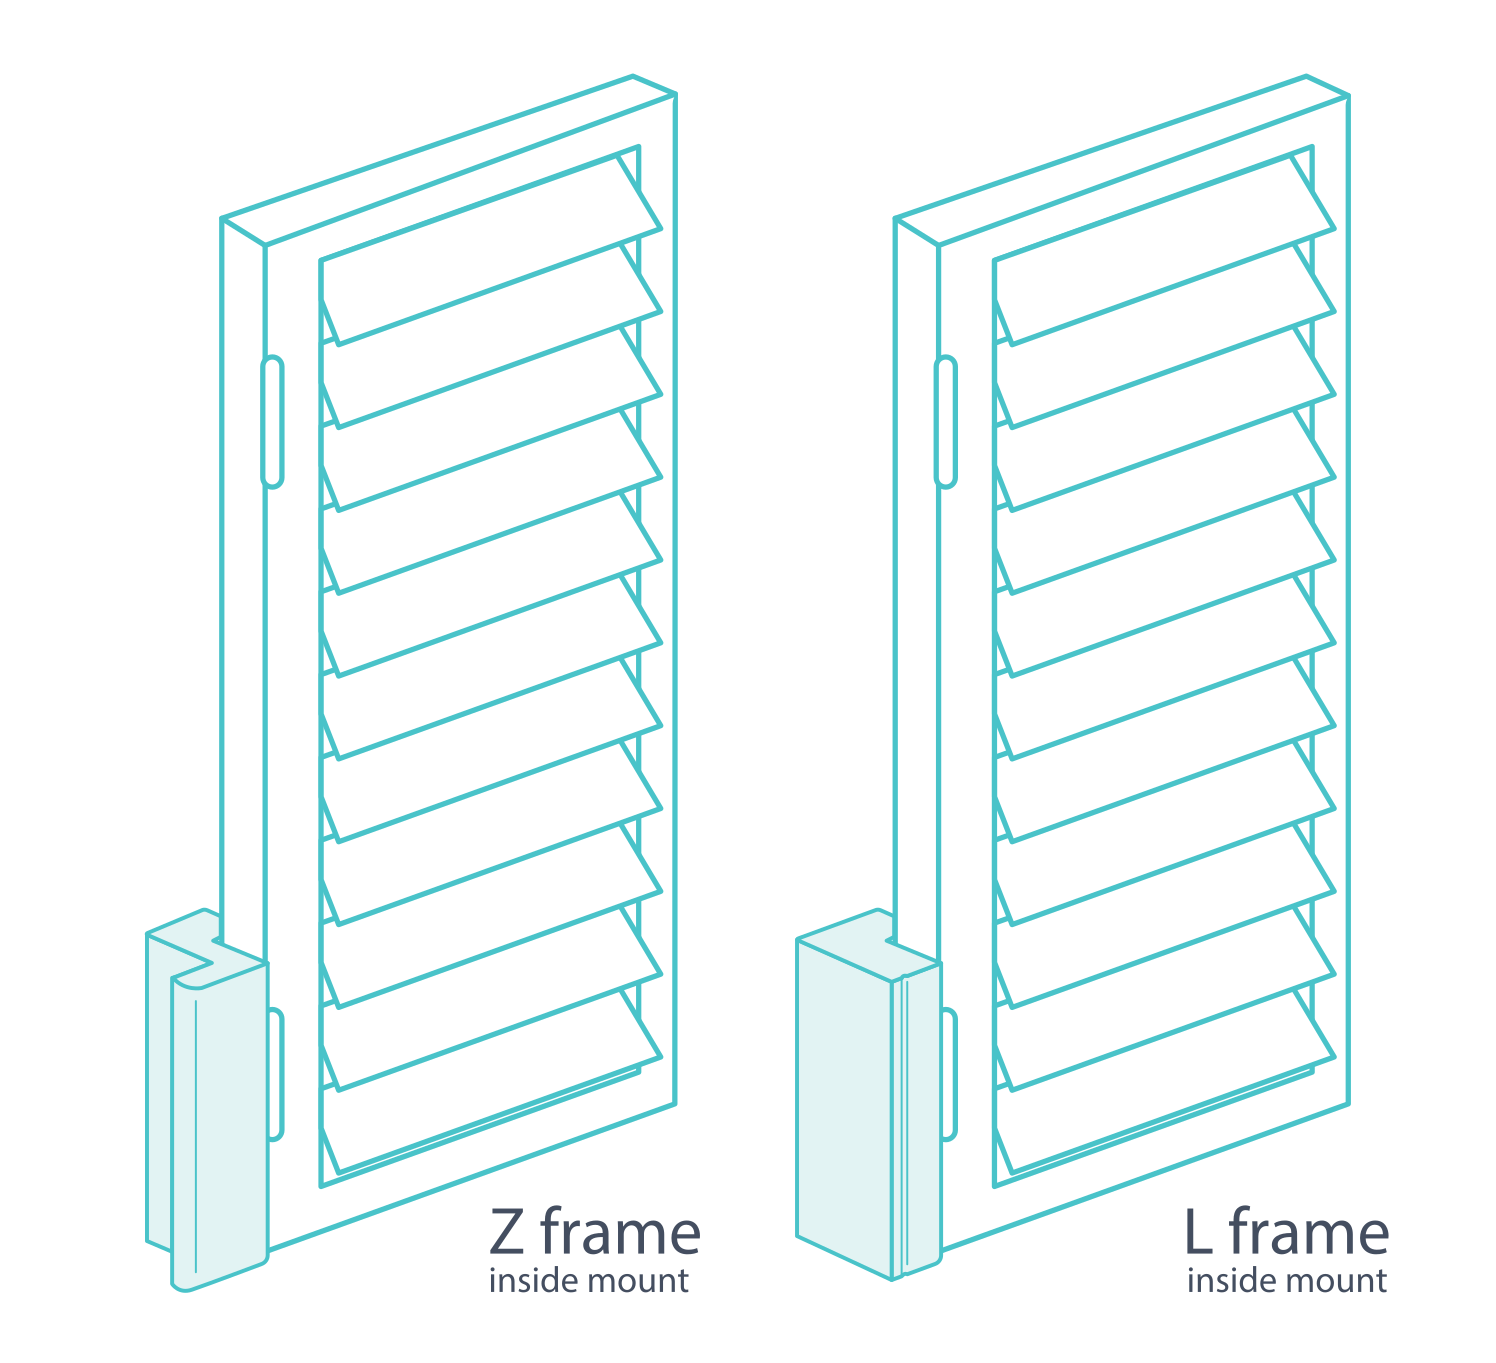
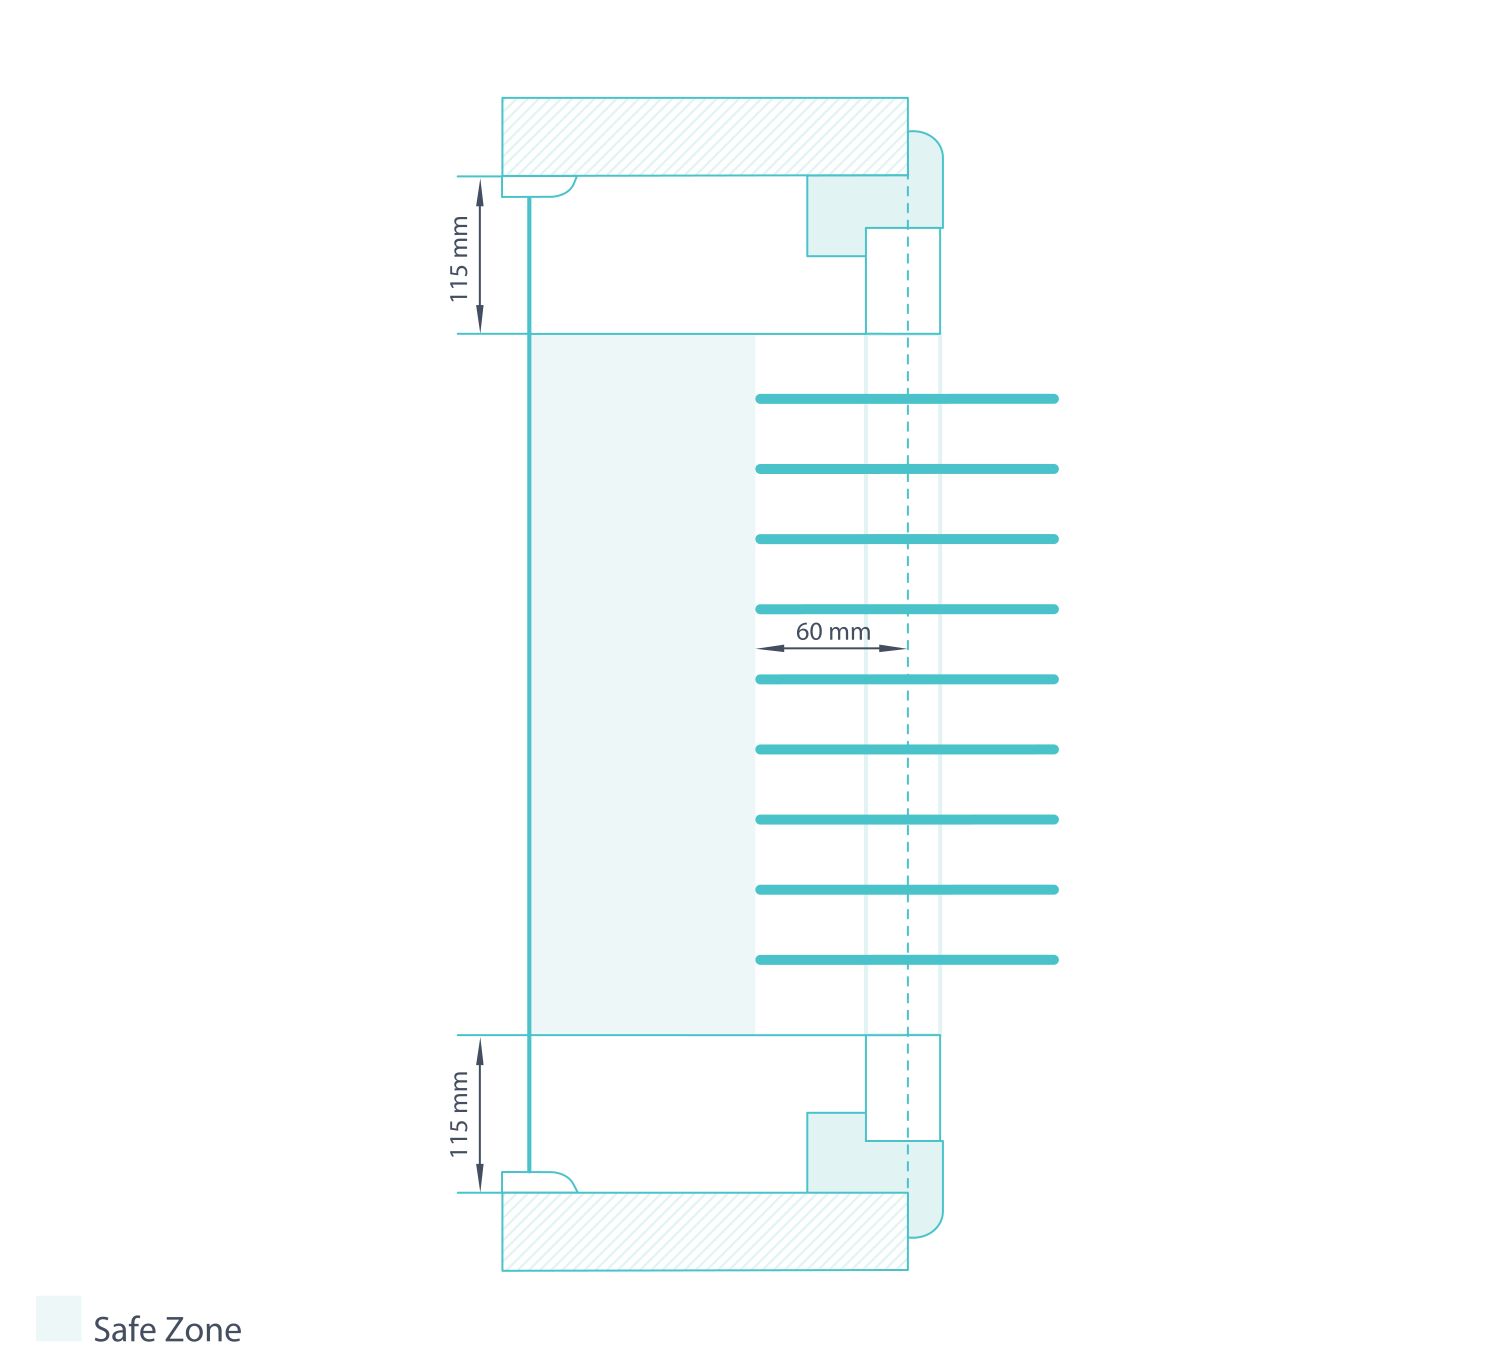
Use 70 mm of clear depth as the initial check for an inside installation. A Z-frame's blades need 60 mm; an inside L-frame's need 70 mm. Less depth may work only where the obstruction is behind a fixed part and the relevant frame and rail clearances have been checked individually.
How do I get around an obstruction?
Identify which part of the shutter would meet the obstruction. The frame is fixed at the perimeter, rails are fixed within a moving panel, and louvres rotate between them. Hardware that clears the frame can still stop a blade opening. A midrail sometimes provides clearance at a known height; otherwise consider moving the shutter forward.
Managing obstructions for a Z-frame
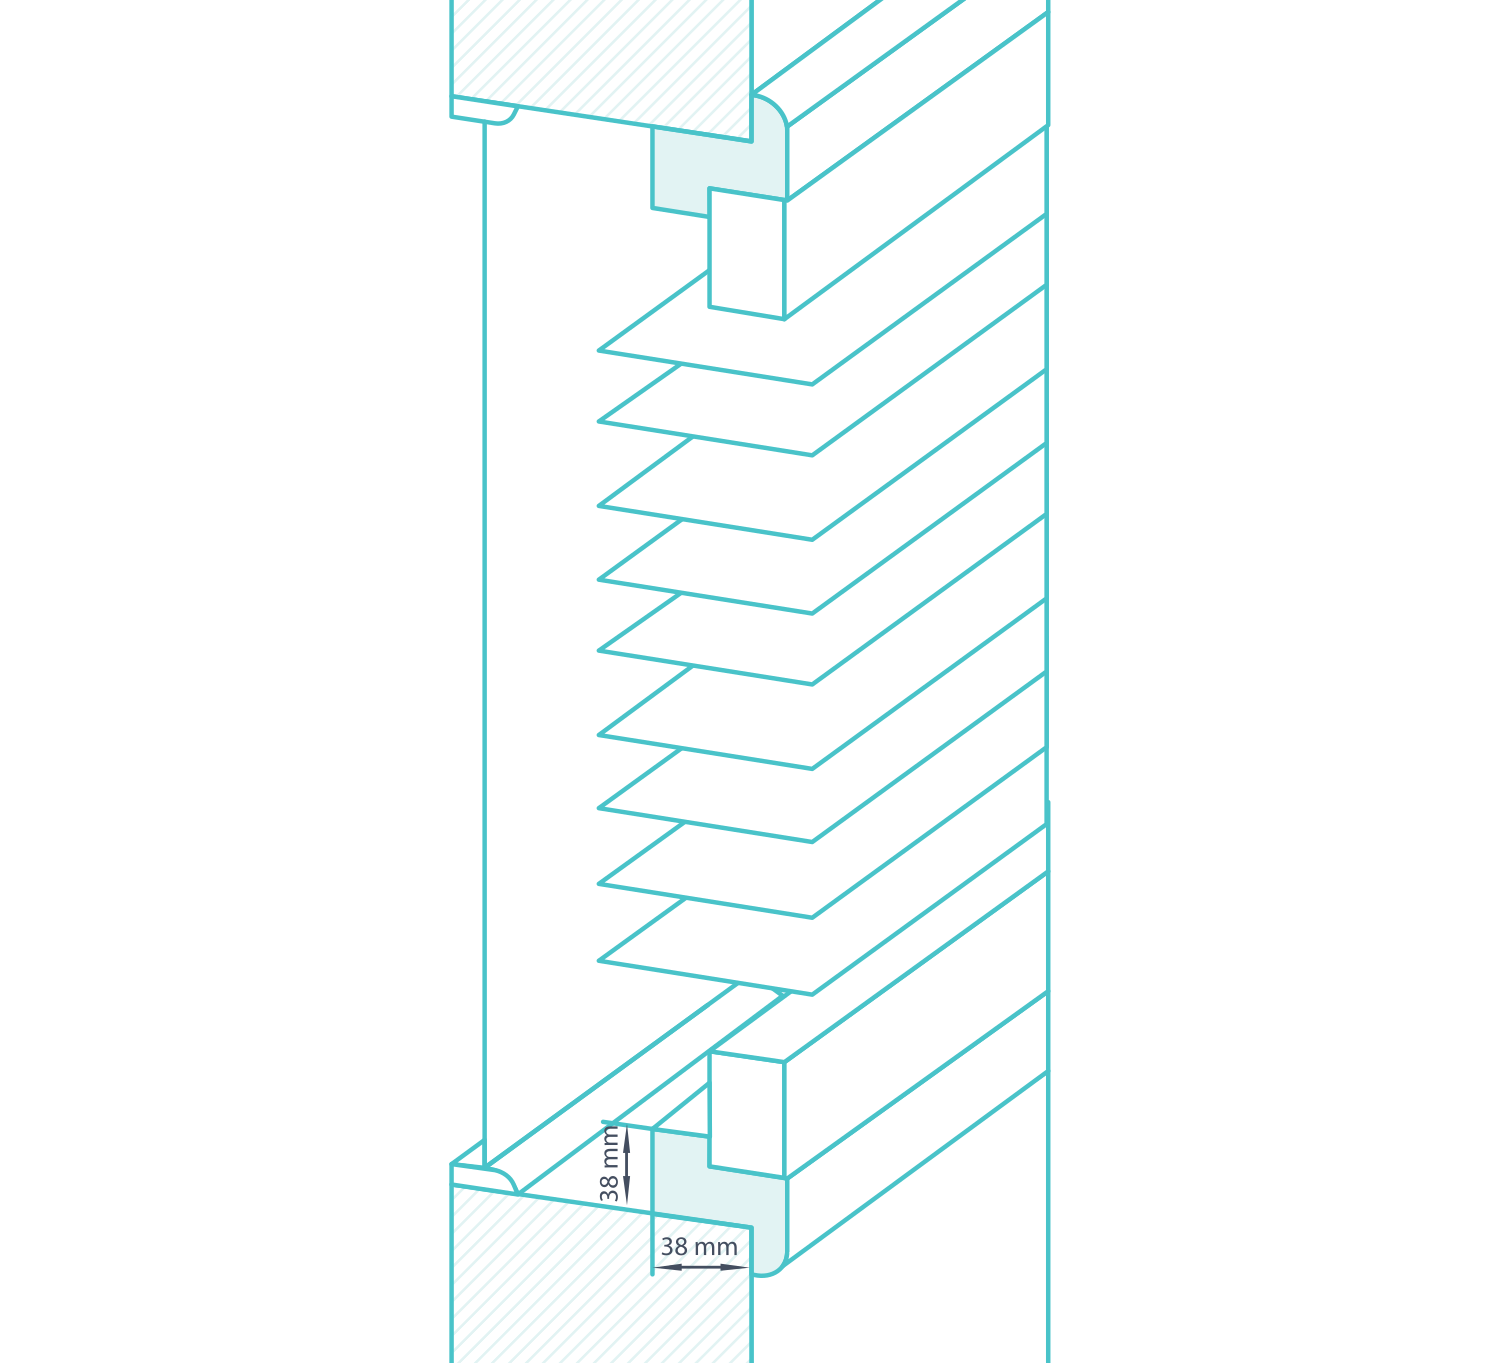
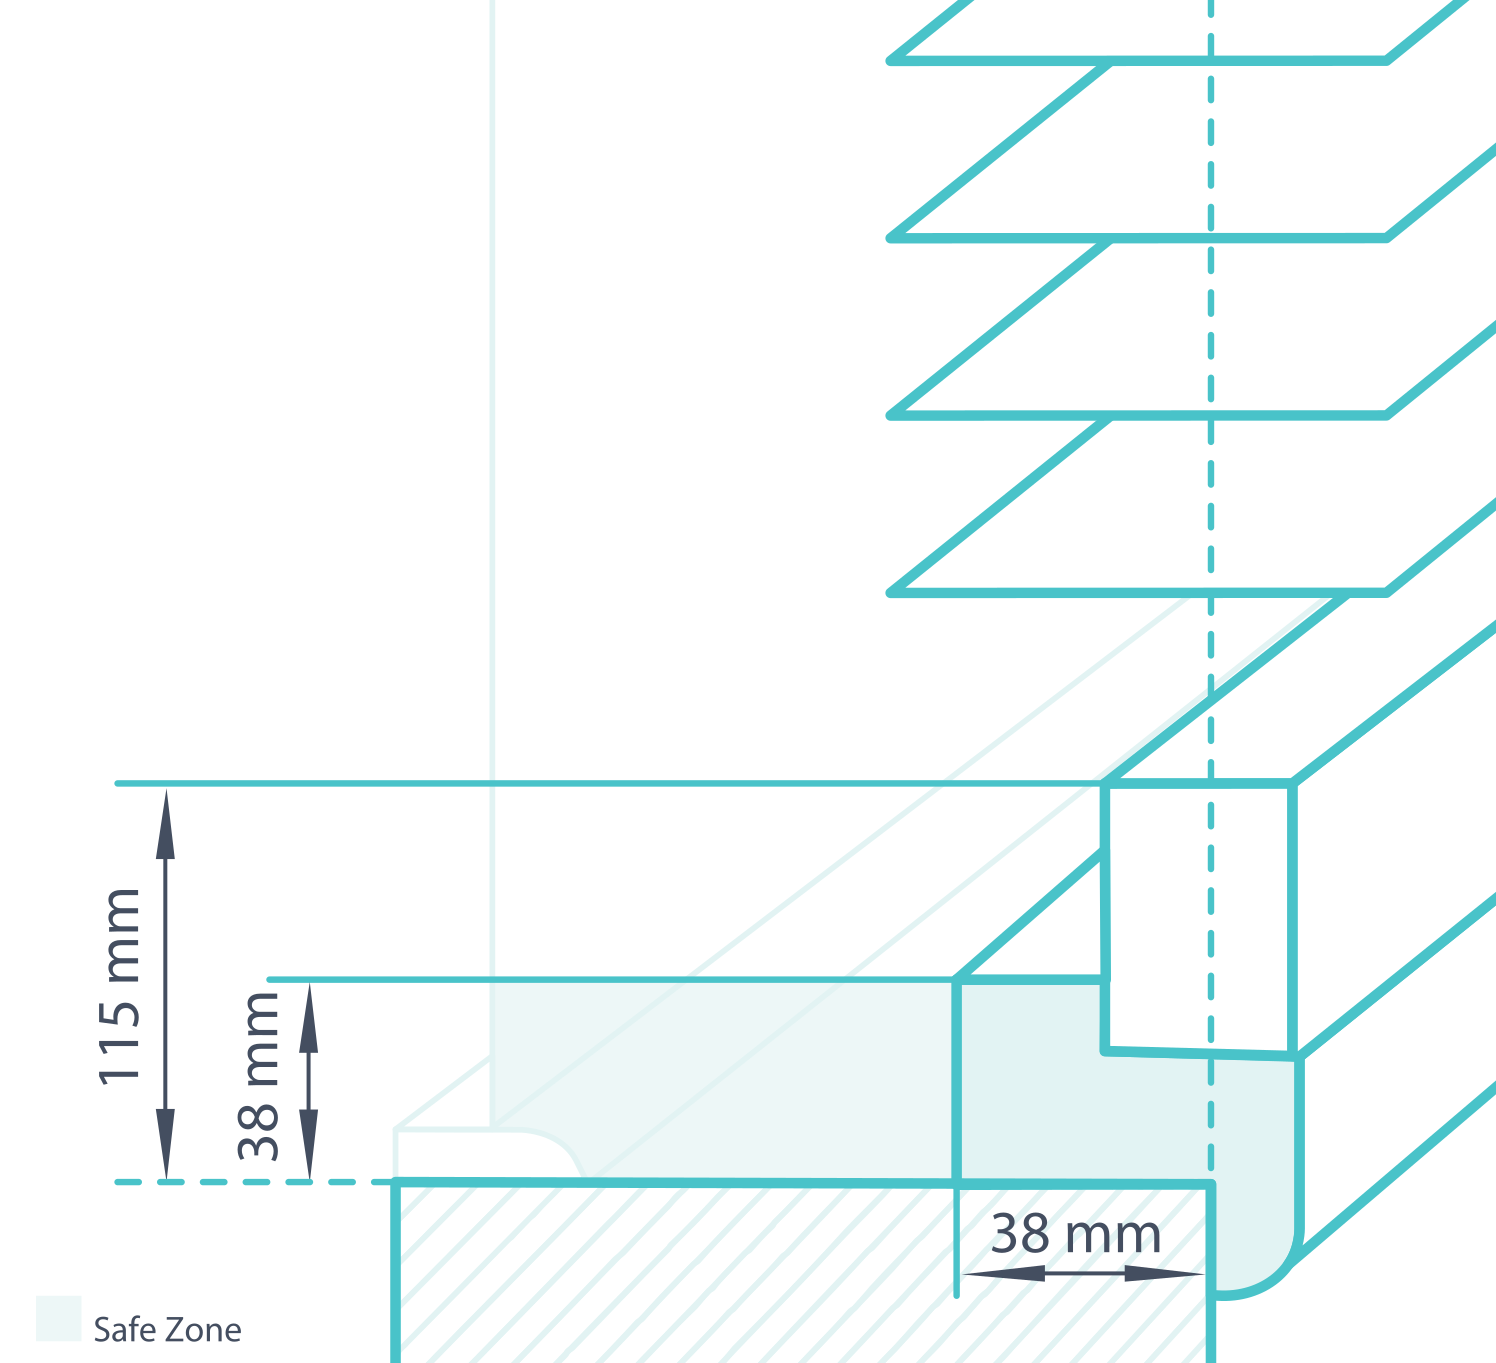
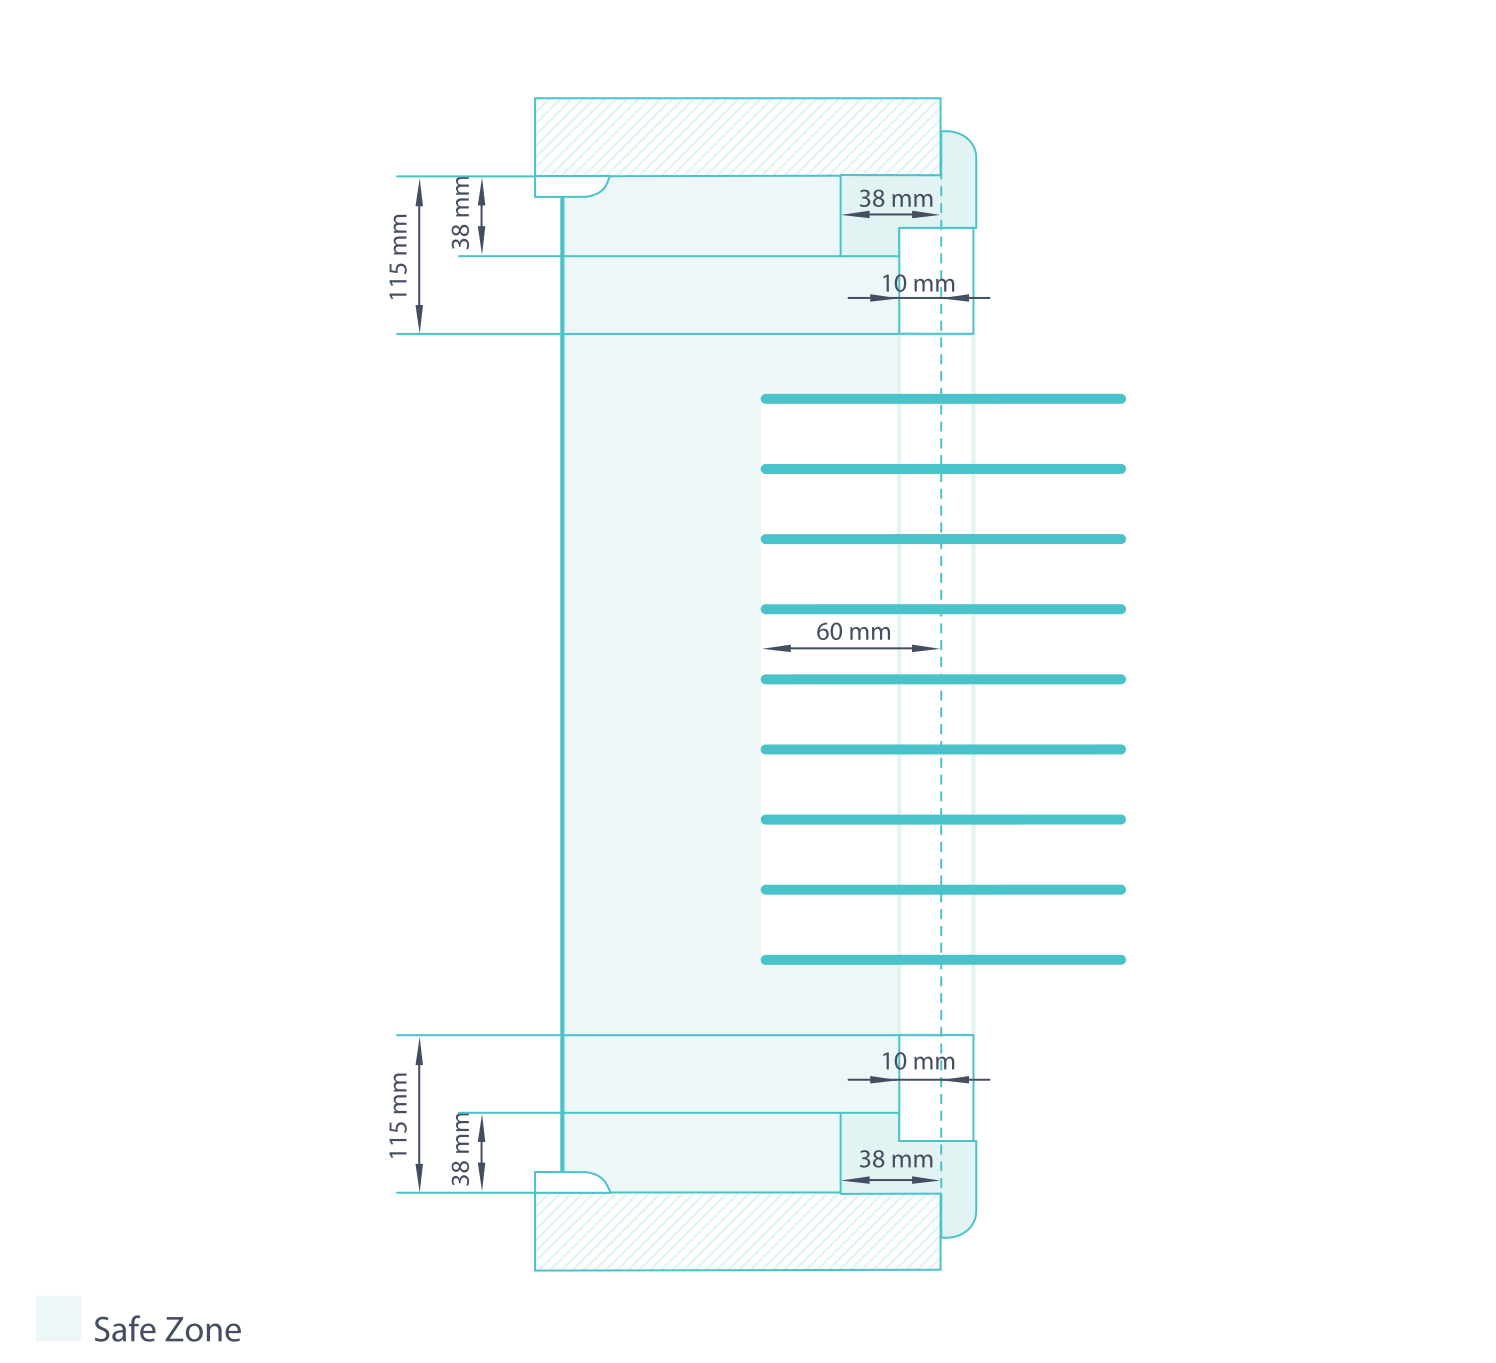
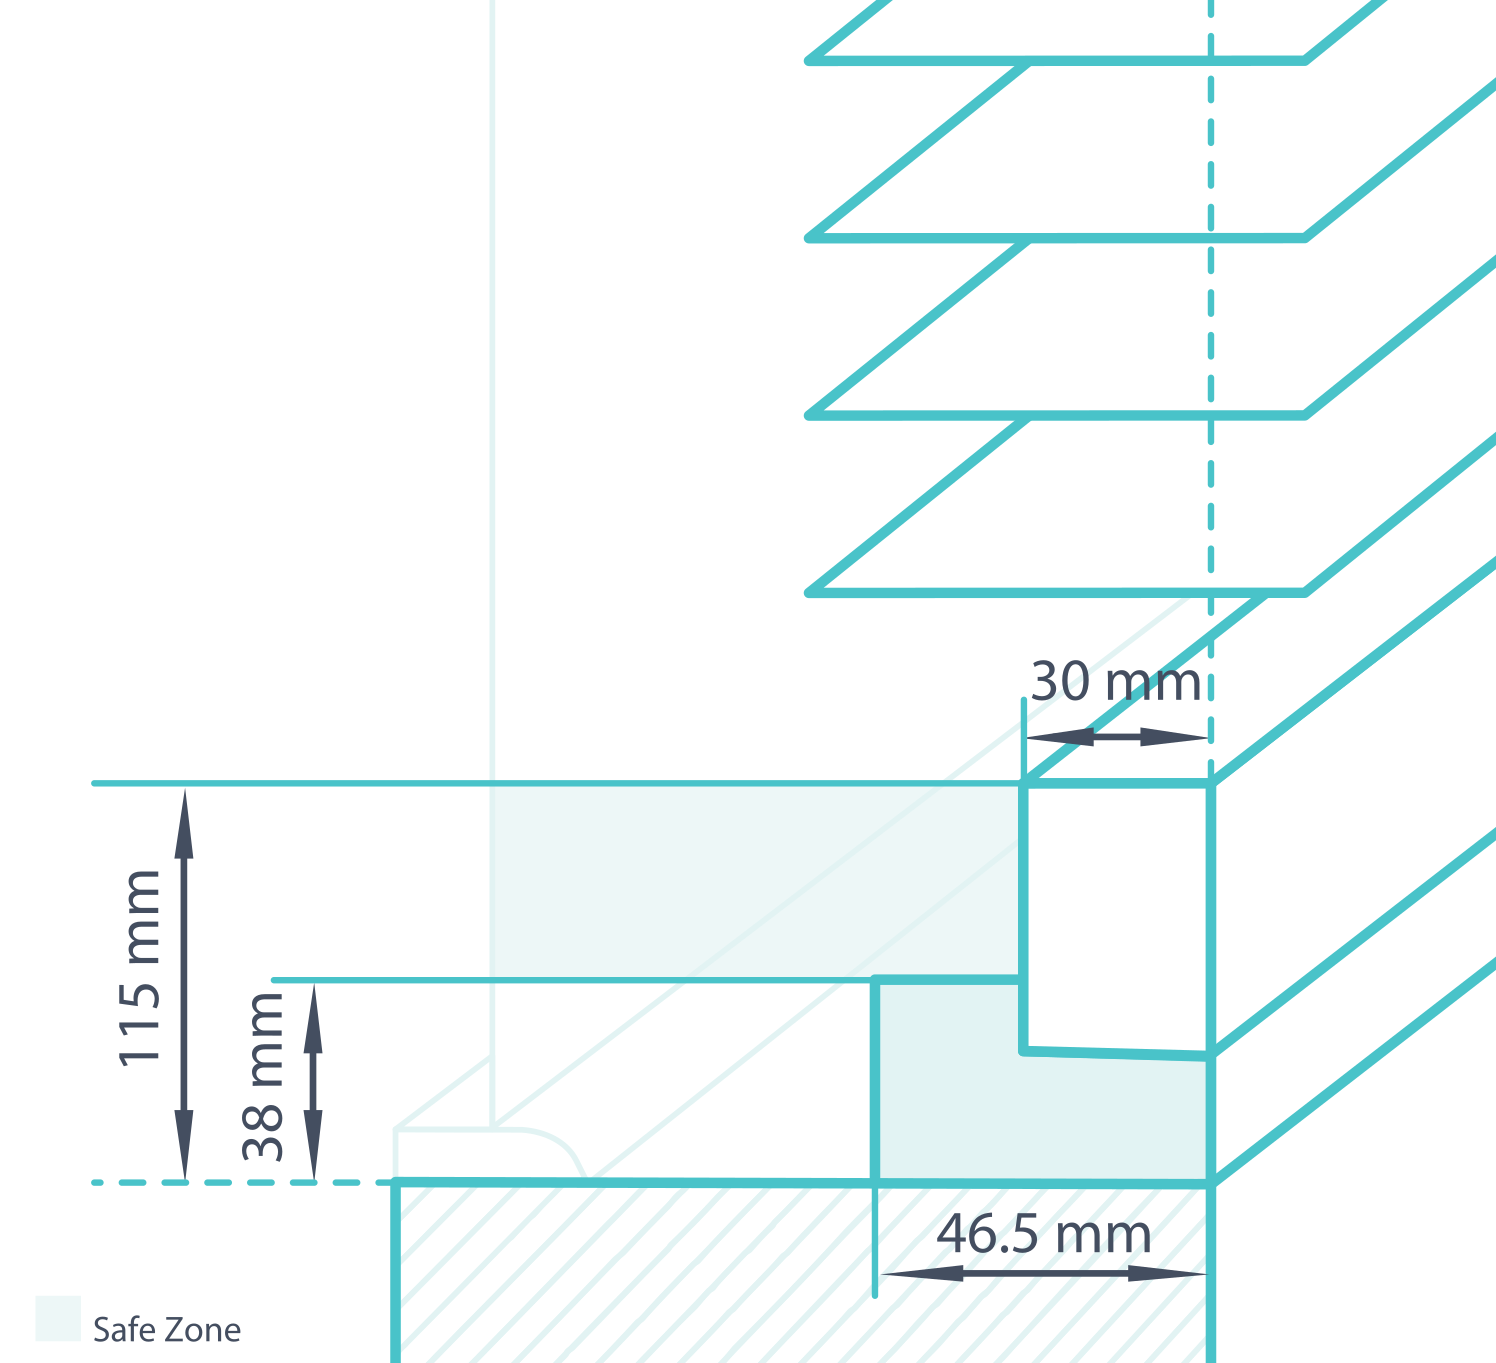
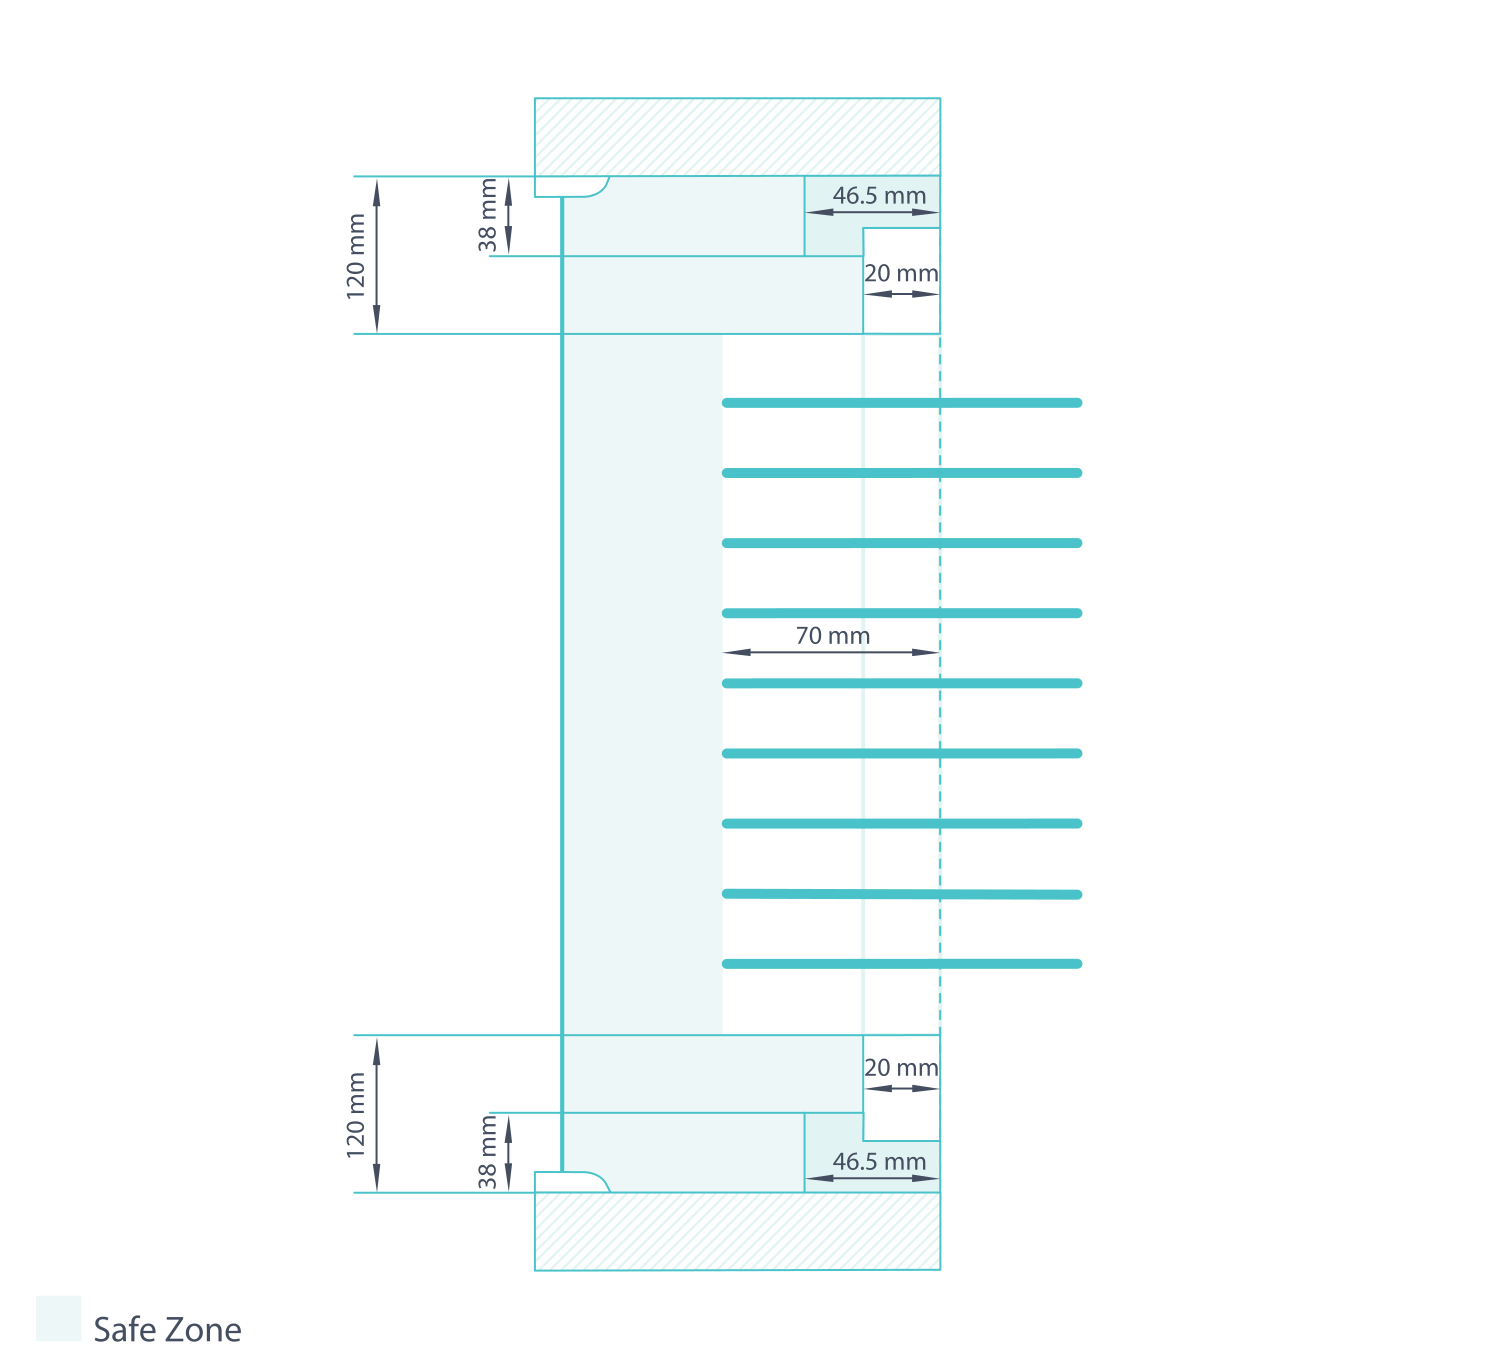
The Z-frame fixing section needs 38 mm of clear depth at the perimeter. This is a frame-fit measurement, not the 60 mm needed by rotating blades. Check each obstruction against the correct zone in the drawings.
Obstructions on the outer edges of your window recess
For hardware beside an opening edge, measure from its most forward point to the recess front. Allow 38 mm for the Z-frame to pass in front. Also check that you can still reach and operate the fitting after the shutter is installed.
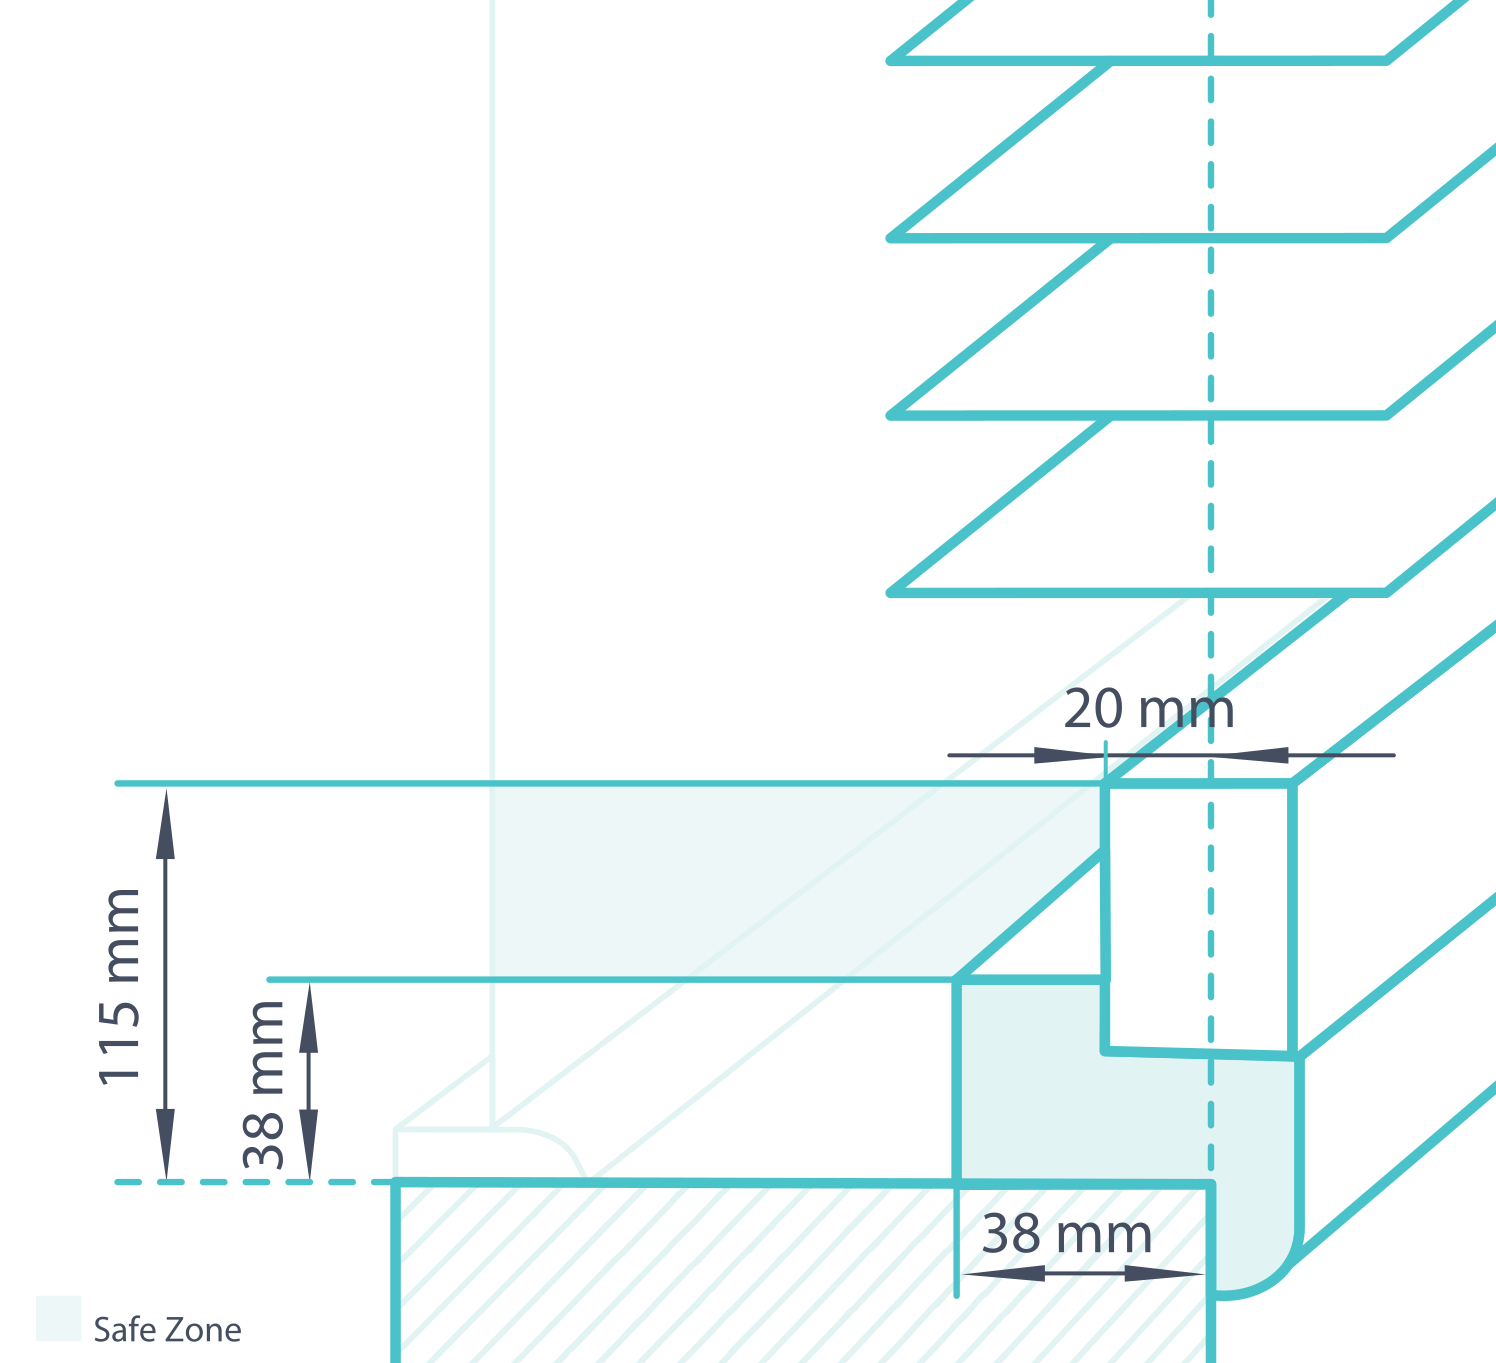
Obstructions located towards the top or bottom of your window recess
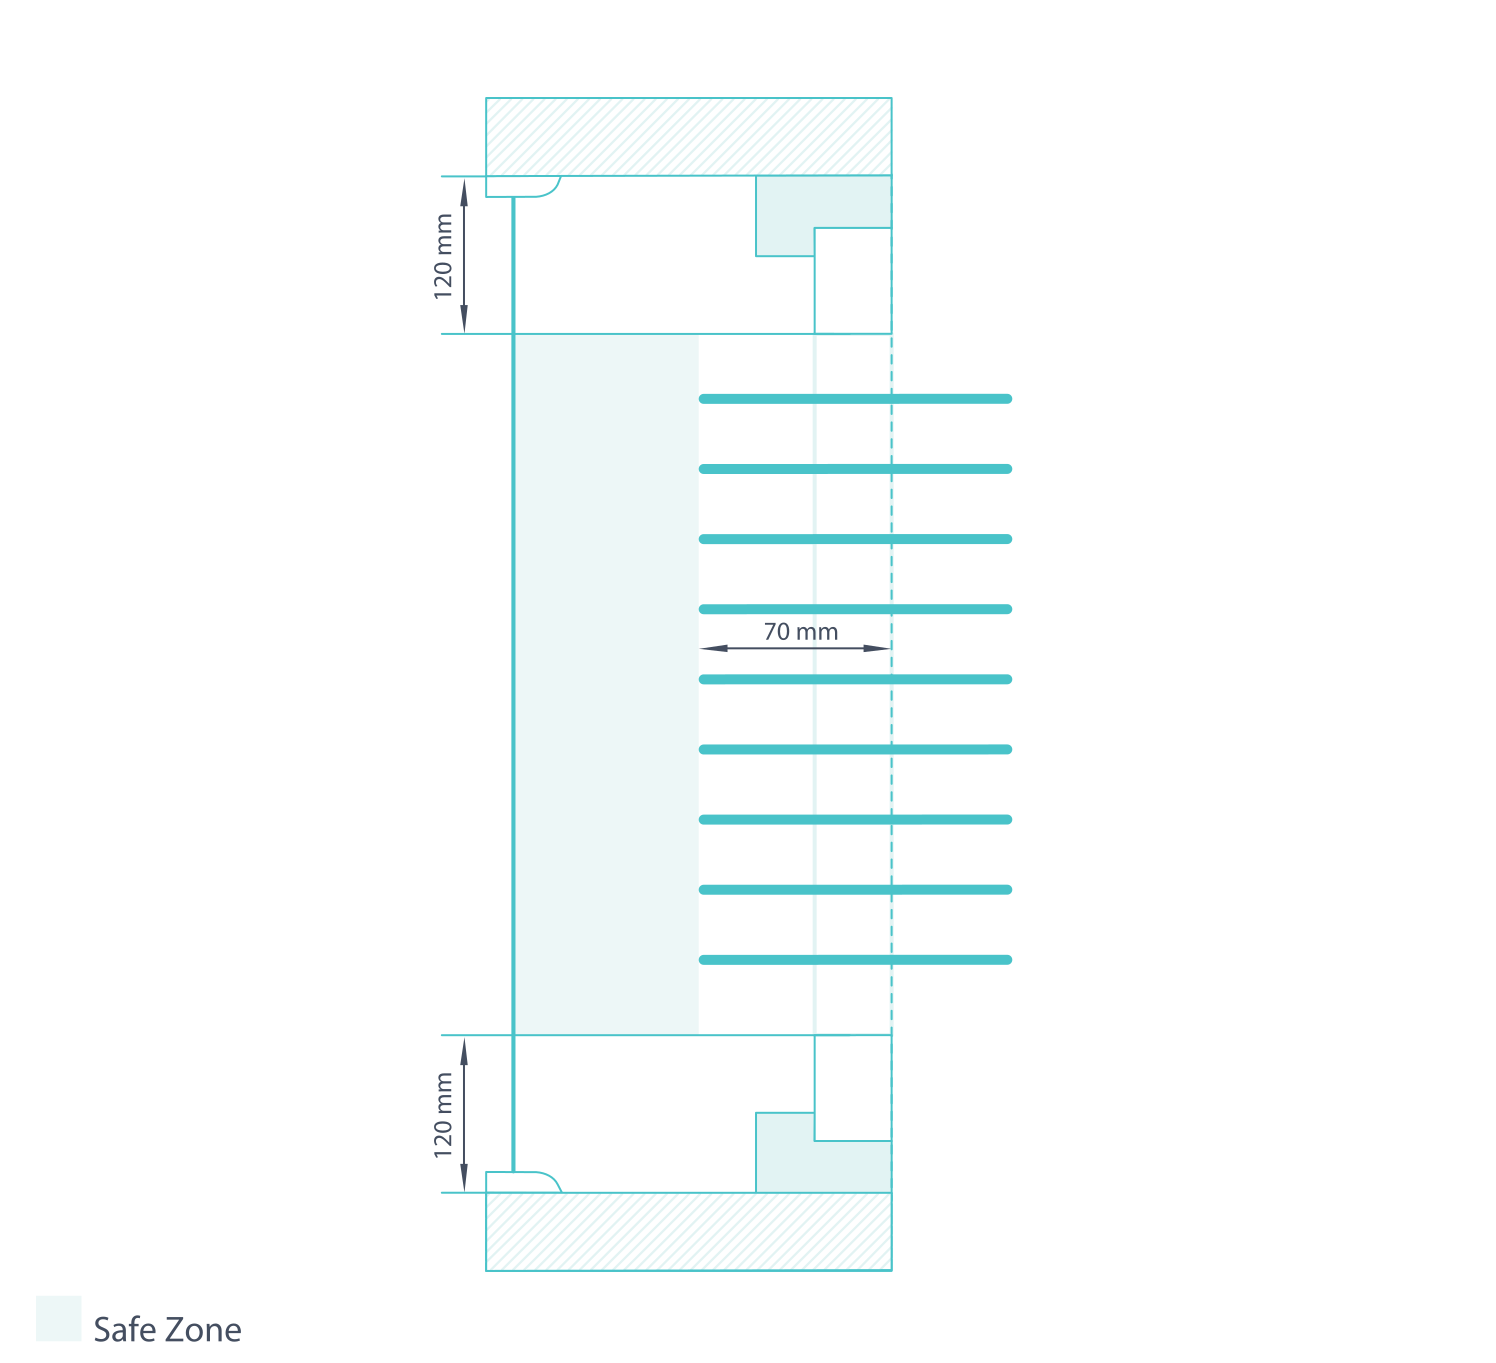
Beyond the frame-fixing area, a fixed top or bottom panel rail can pass in front of some hardware. Allow at least 20 mm of clear depth in that rail zone. Confirm the rail actually covers the obstruction's height rather than assuming it does.
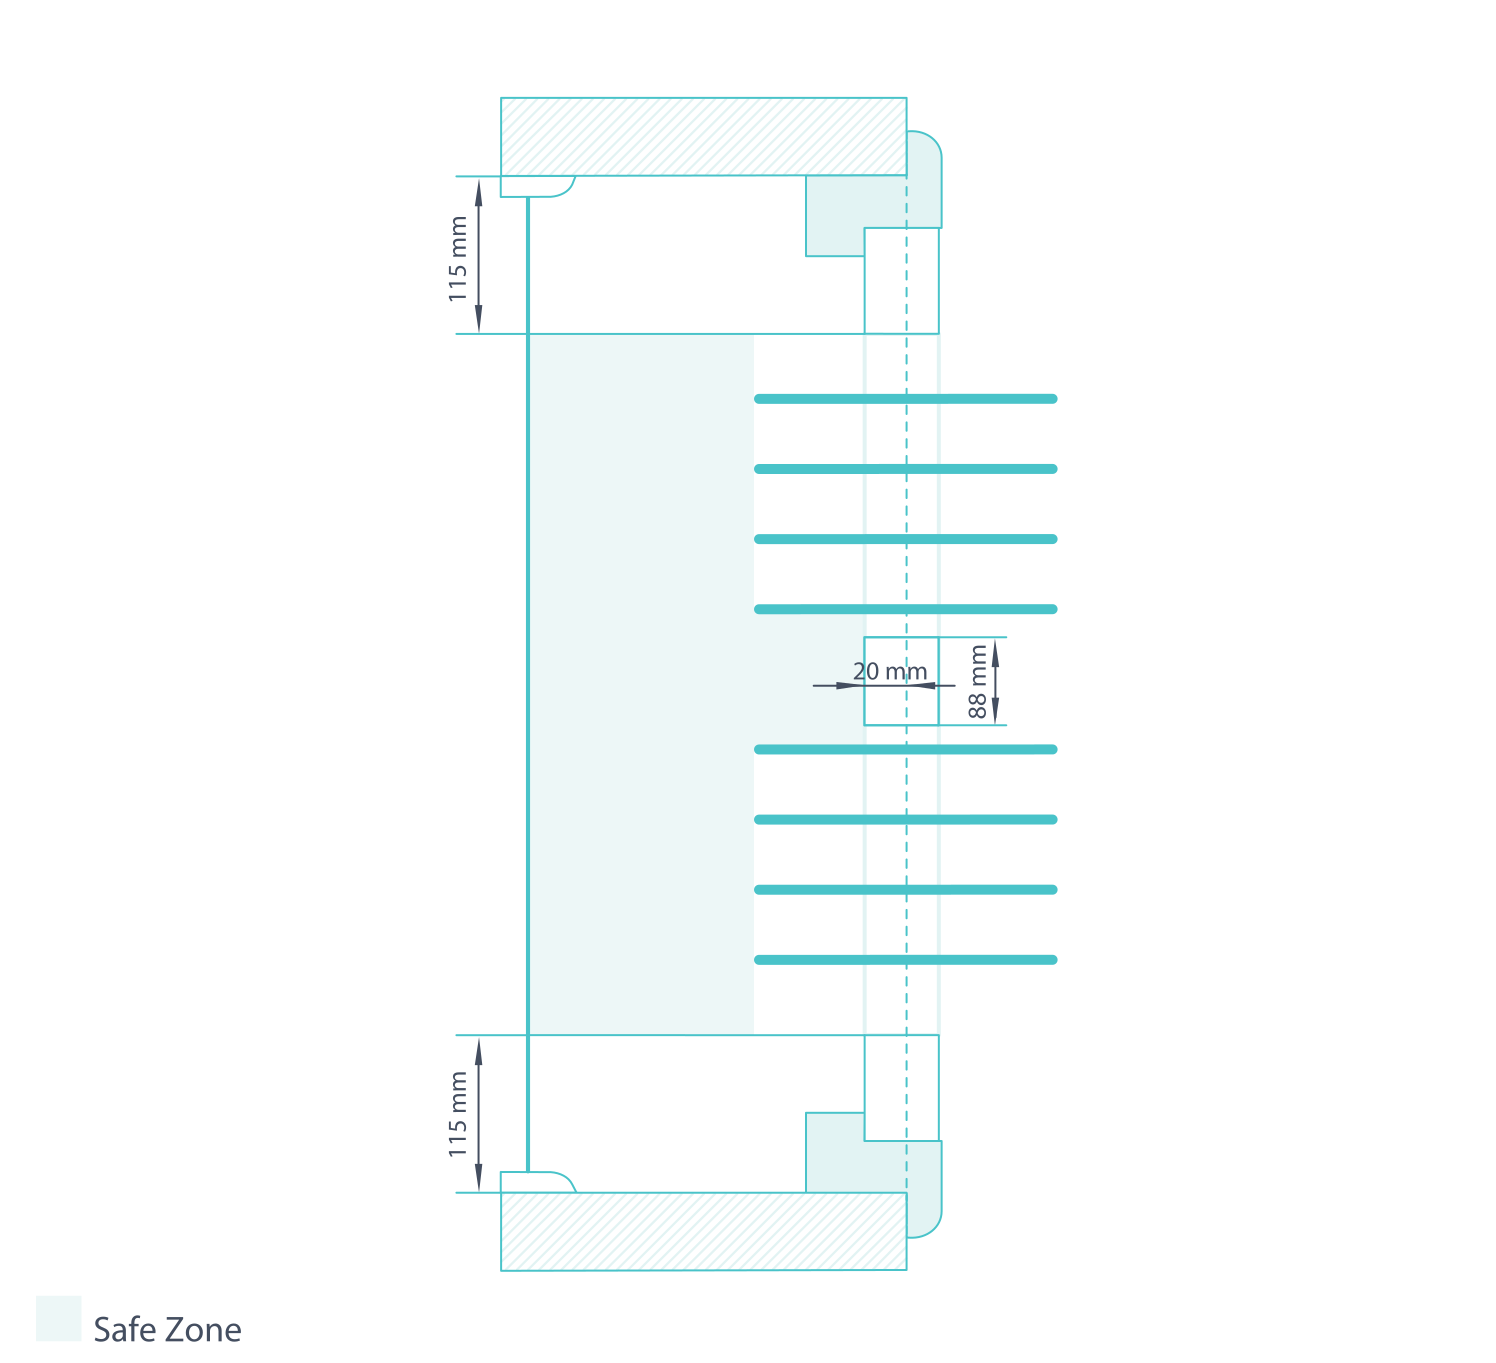
Obstructions located towards the centre of the window
Top and bottom rails are generally 85–148 mm high. An obstruction around 114 mm from an opening edge needs its position checked against the final rail layout. Where it meets rotating blades, allow 60 mm of clear depth.
A midrail aligned with central hardware can reduce the depth required in that fixed-rail zone to about 20 mm. Confirm the alignment and access before using this approach.
Obstructions on the sides of your window recess
After checking the perimeter frame zone, side hardware within 70 mm of the opening edge can sit behind the fixed panel area with 20 mm of clearance. Beyond 70 mm, check the rotating-blade zone and its 60 mm requirement. The perimeter frame still needs its own 38 mm clearance.
Summary: managing obstructions for an inside Z-frame
Check the Z-frame perimeter, fixed panel rails and rotating blades separately: 38 mm for the fixing frame, 20 mm behind an appropriately positioned fixed rail, and 60 mm behind opening blades. Record the obstruction's height and distance from the side as well as its depth.
Managing obstructions for an L-frame
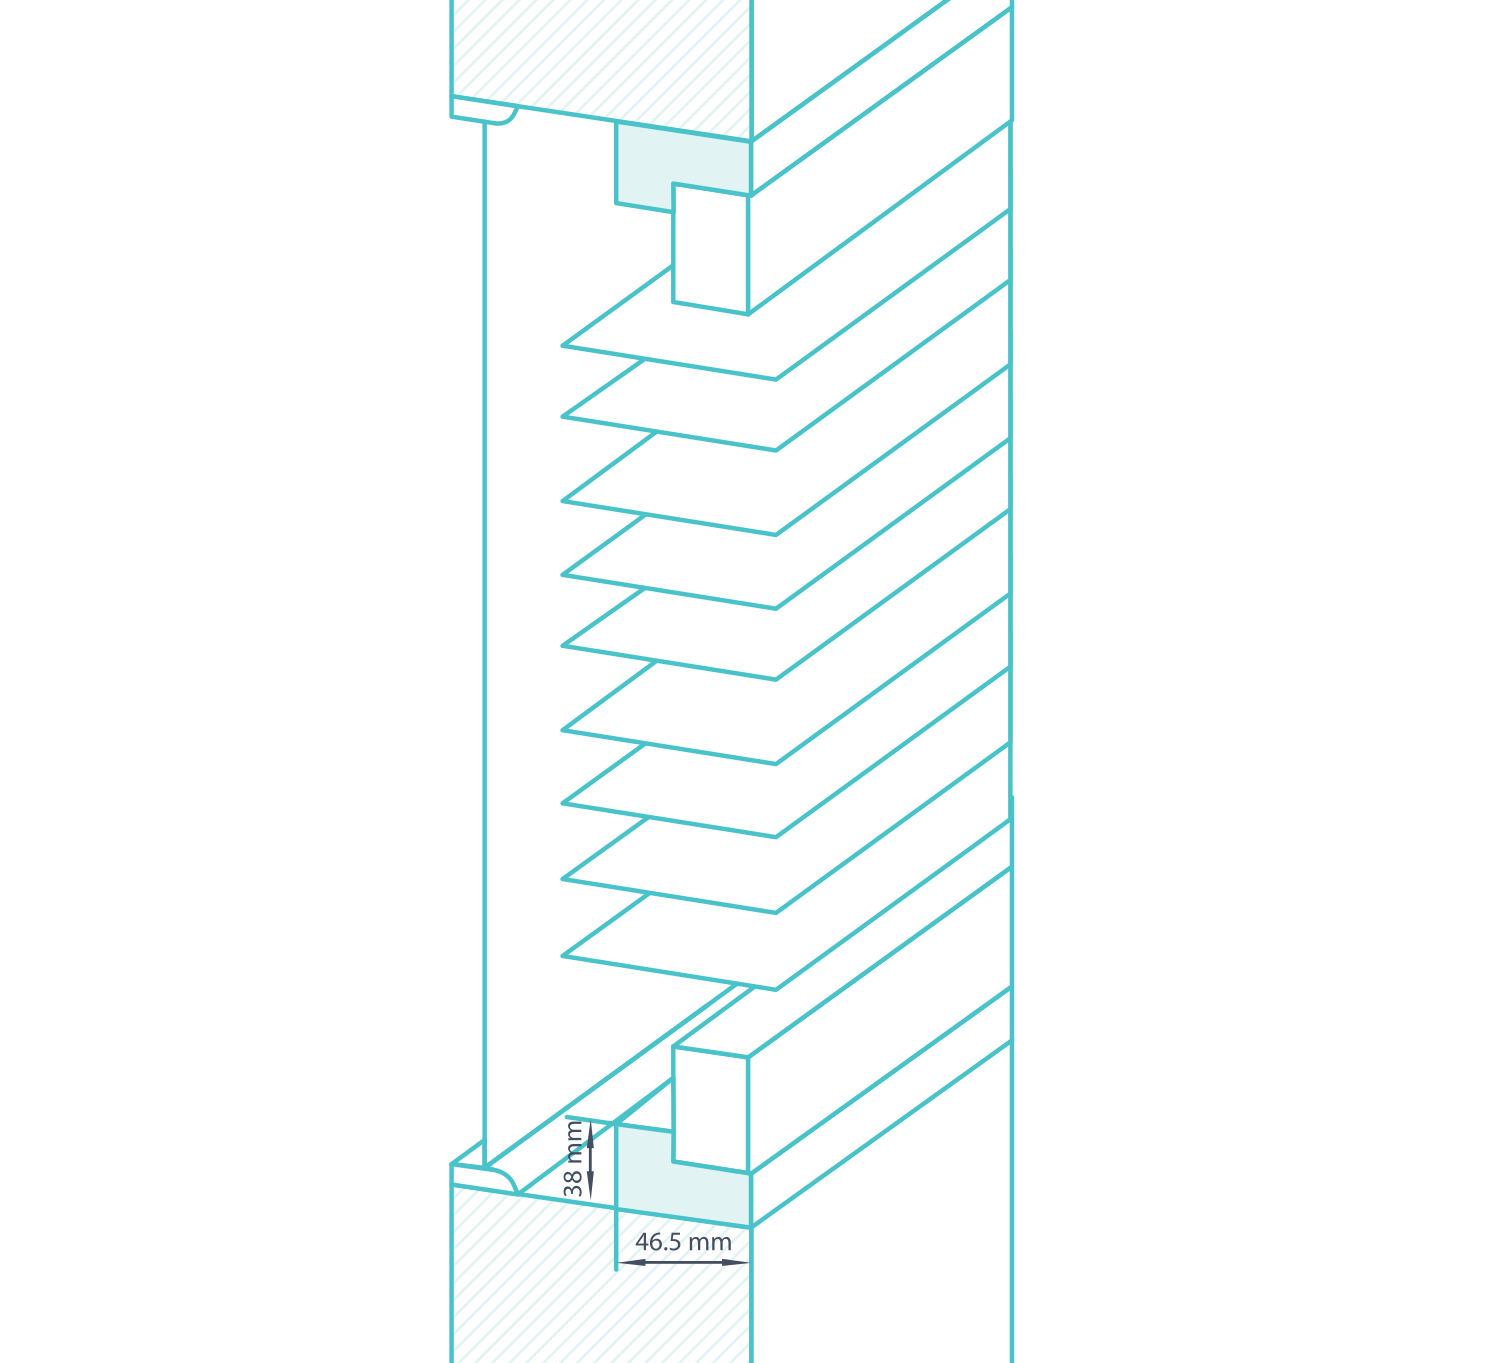
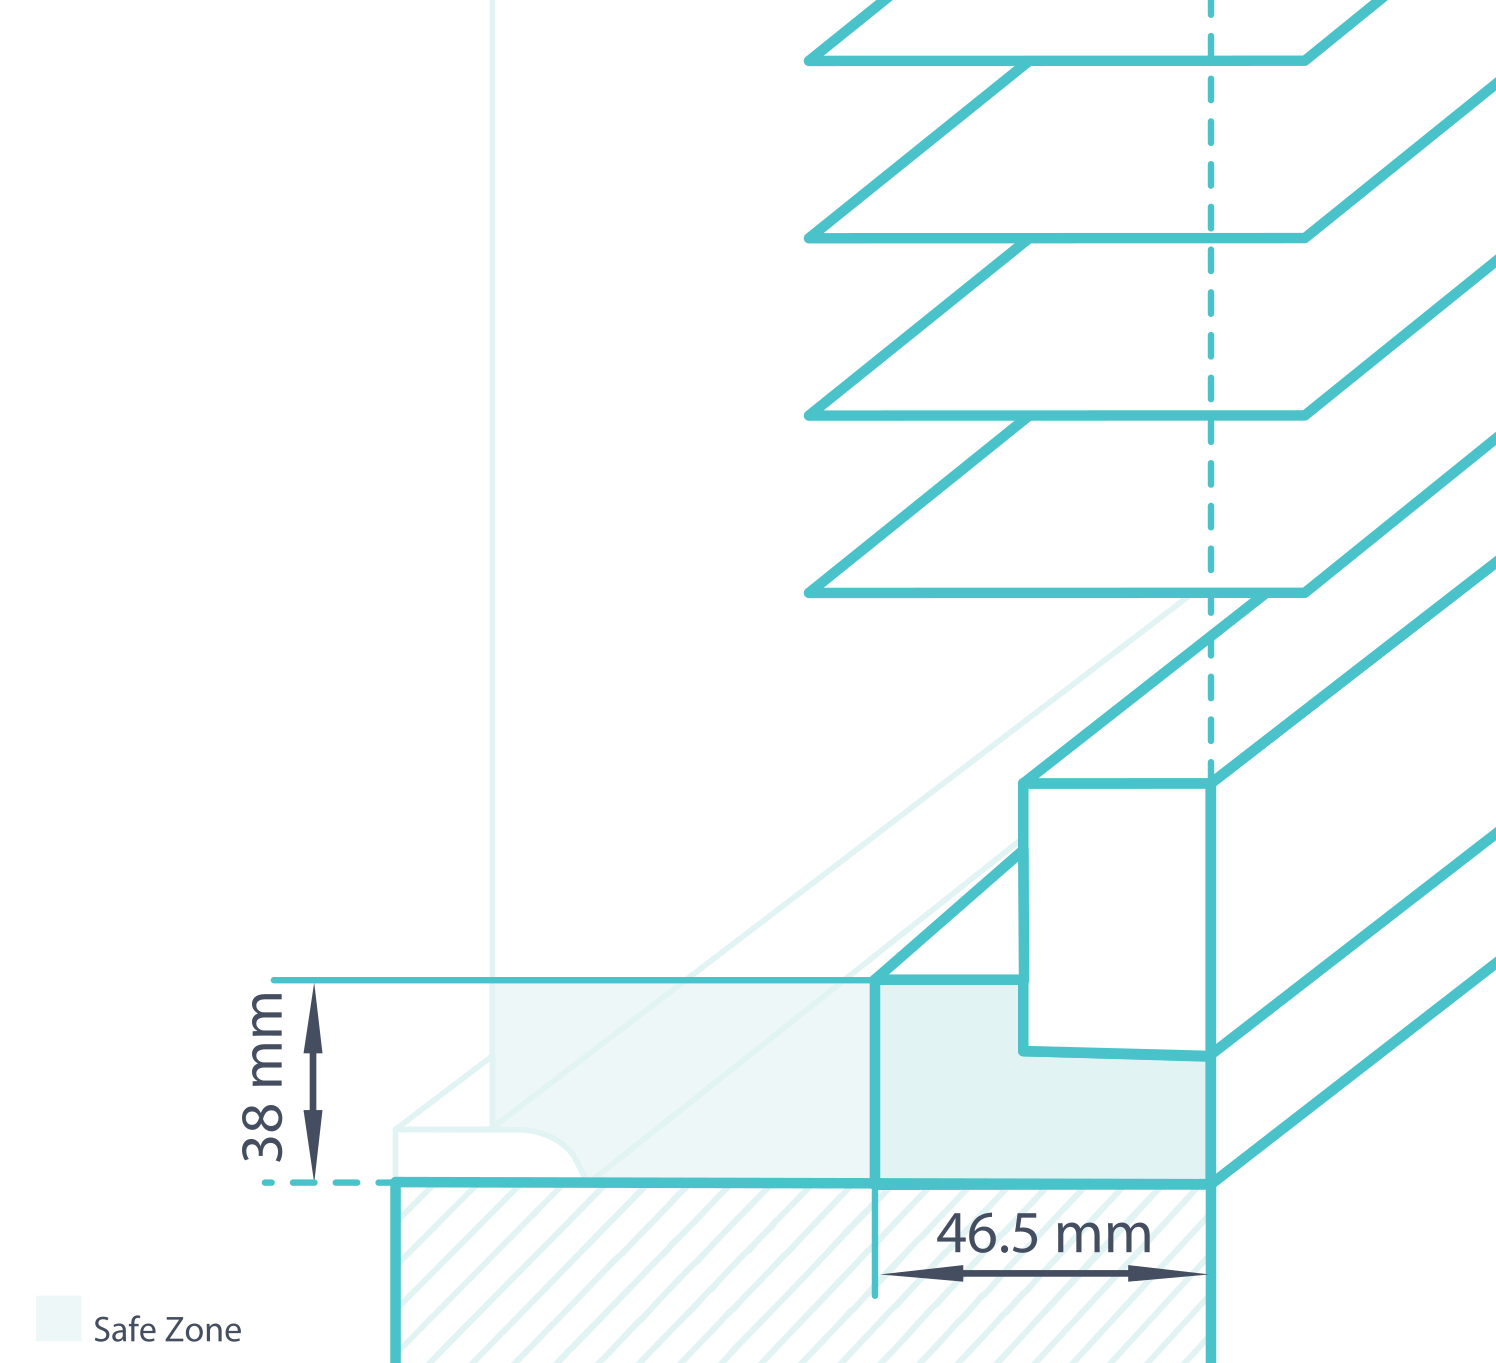
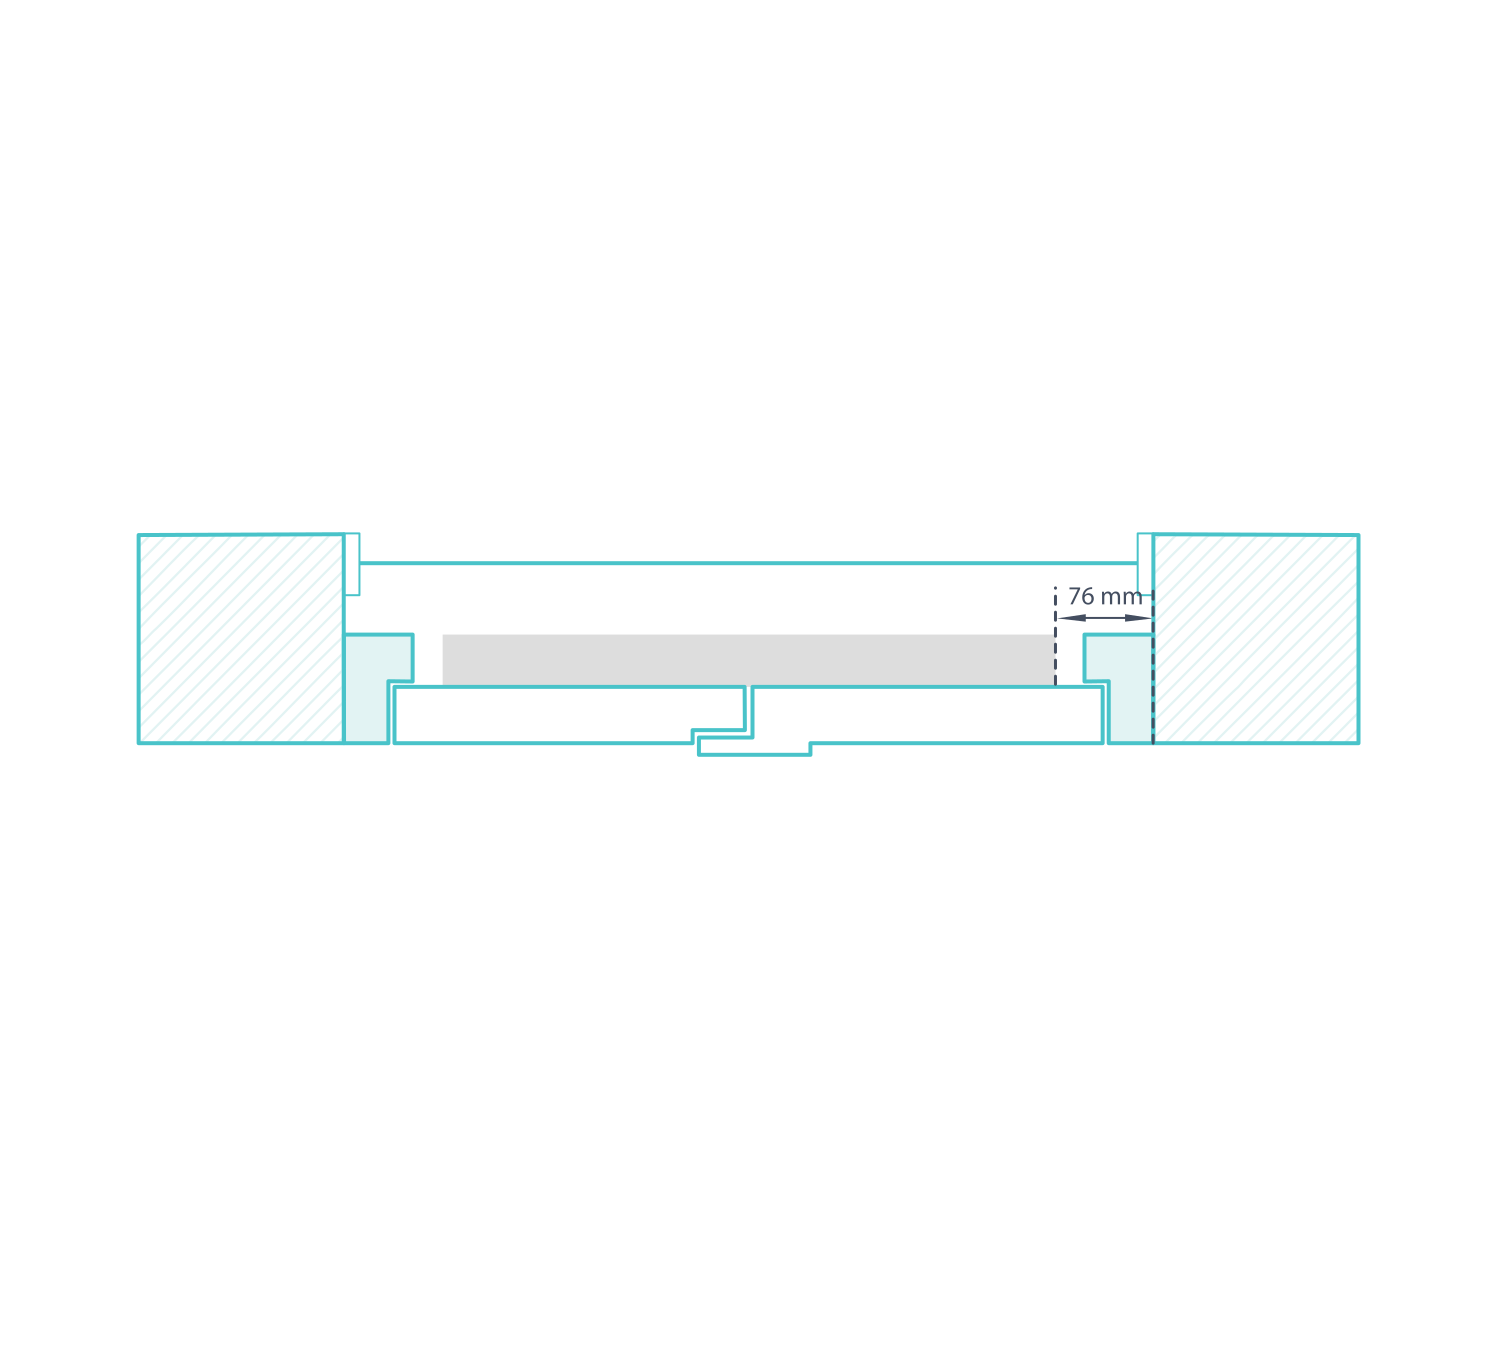
The inside L-frame needs approximately 47 mm to fit its fixed profile within the recess. The detailed drawing shows the profile dimension; freely opening louvres still need 70 mm. Do not use the smaller frame depth for the whole shutter.
Obstructions on outer edges of your window recess
Within approximately 38 mm of a recess edge, hardware can conflict with the L-frame itself. Allow at least 47 mm from the obstruction to the front reference. Leave practical access to any handle or key that must remain usable.
Obstructions located towards the bottom or top of your window recess
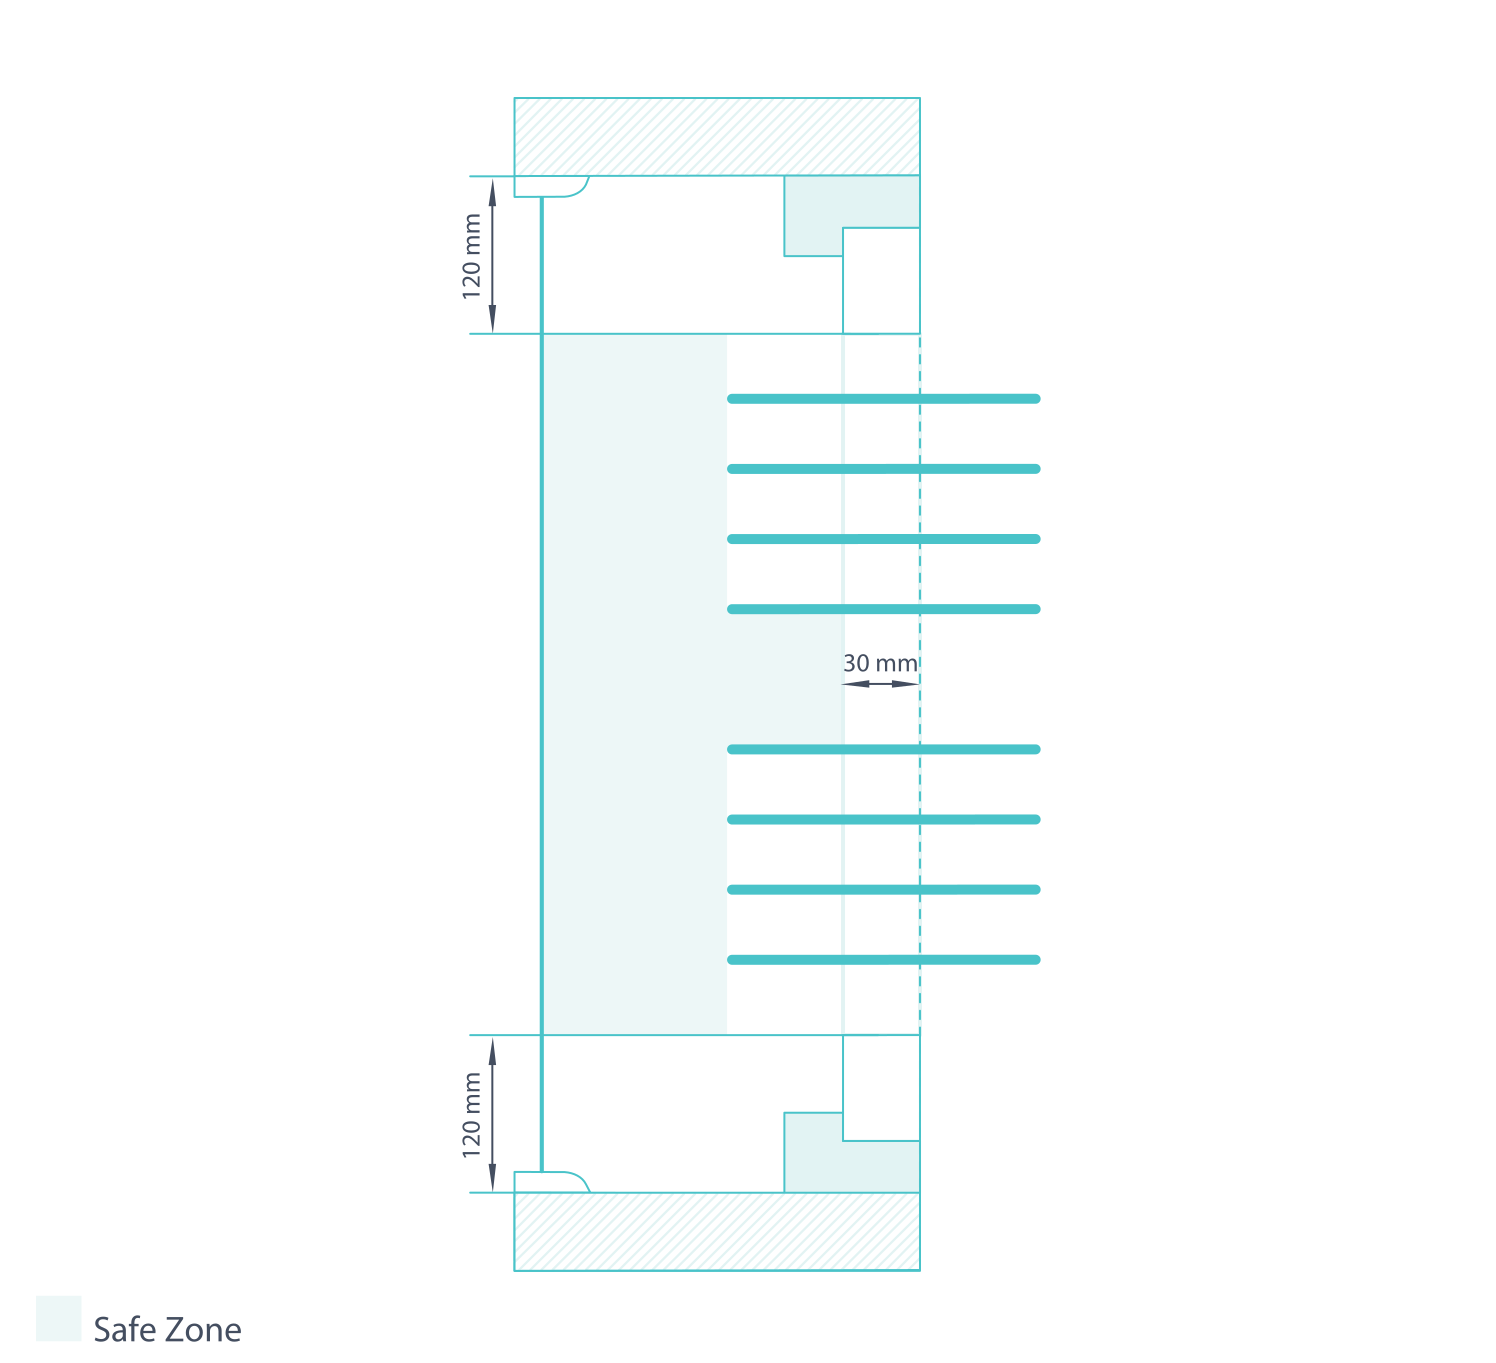
Beyond 38 mm from the top or bottom edge, the fixed panel rail may pass in front of the fitting. This zone needs at least 30 mm of clear depth. Check the rail position and leave enough access to use the window hardware.
Obstructions located towards the centre of your window
Top and bottom rails are usually 85–148 mm high. Check hardware around 150 mm from an opening edge against the blade area. Opening louvres require 70 mm of clear depth.
An aligned fixed midrail can pass in front of central hardware with around 30 mm of clearance. Confirm the final rail height before relying on that smaller figure.
Obstructions located on the sides of your window recess
For side hardware beyond the 38 mm perimeter zone, allow at least 30 mm behind fixed shutter components. More than 78 mm from the side, the obstruction may sit behind rotating louvres; allow their full 70 mm depth. Check both the distance from the edge and the projection into the recess.
Summary: managing obstructions for an inside L-frame
Check the L-frame's perimeter profile, fixed rails and opening blades independently. Record every obstruction and test the window's movement. If a workable inside position is too tight or restricts access, an outside frame can move the assembly in front of the conflict.