
My Direct Blinds / Installation
Curved curtains installation guide
Ceiling and wall fitting, bracket planning, hanging and dressing for the supplied curtain system.
01 Your shaped track
Lay out the supplied shaped pieces in their ordered positions before marking supports. Keep the supplied bend or corner shape and use the mounting method for your brackets. Do not reshape the track on site without instructions for your order.
02 Choose fixings for the surface
Check the delivered fixing pack before starting; bracket-fixing screws may need to be sourced separately. Use the fixing reference below for curtains and blinds, excluding shutters, and obtain any missing fixings suitable for the surface.
Use the product-specific anchoring instructions with this general reference. Select fixings to suit the actual wall construction, bracket and load.
| Surface | Fixing reference |
|---|---|
| Wood | Recess: 3/4 inch (20 mm), 8 gauge. Face: 1/2 inch, 8 gauge. |
| Steel | 1/2 inch, 6 gauge. |
| Ceiling | Toggle bolt. |
| Plasterboard | Wall mates. |
| Aluminium | 1/2 inch, 8 gauge, or tech screw. |
| Brick | Green plug and 1 1/2 inch, 8 gauge self-tapper. |
03 Prepare the space and equipment
Use two people and allow approximately 20-30 minutes for a standard installation. Keep hands, the window, work surface and floor clean. Clean cotton gloves can help protect the fabric. Unpack on a clean, sturdy surface or clean packaging cardboard.
Have a metal tape, stepladder, pencil, cordless drill with Phillips head, 3 mm drill bit, stud finder and protective eyewear ready.
Check the curtain panels, track pieces, ordered wand, matching ceiling or face brackets, screws, spare pleat hooks and any oversized-track joiners. Motorised tracks use butterfly ceiling brackets and, for wall mounting, wall brackets.
Timber fixings go into ceiling battens or wall studs. For plaster, locate these supports with a stud finder, or use Ramset 10 mm Grip Hollow Wall Anchors. For concrete, stone, brick or tile, use a masonry drill and suitable anchors, plugs or screws. Source plaster/masonry fixings separately. Confirm the delivered screw pack before starting.
04 Lay out the track and supports
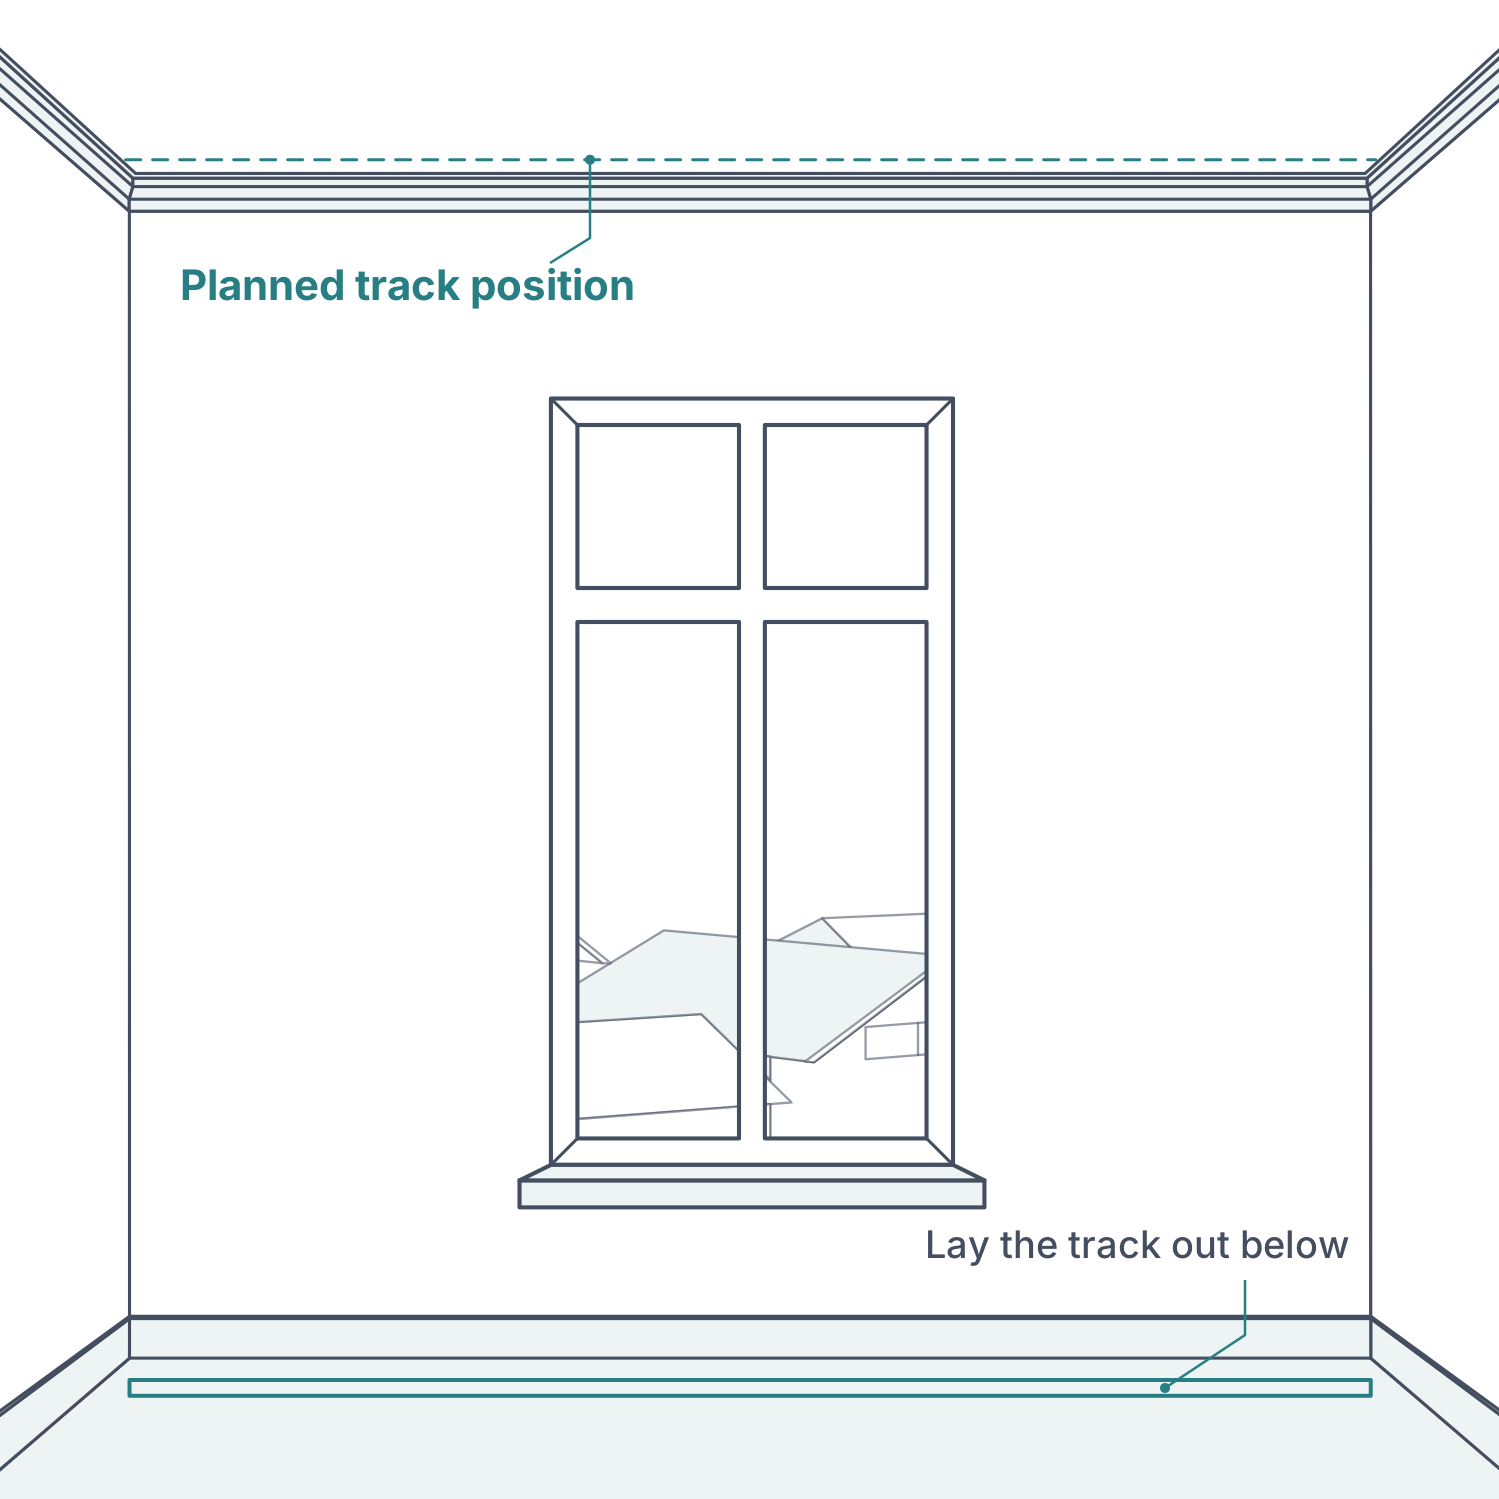
Place the track near the window and check its width and installation position. If a manual track is supplied in pieces, join them on the floor: insert both ends into the joiner until they meet at its centre.
Lay out brackets using the width schedule below, normally 600 mm apart where the building supports permit. Ceiling battens are typically 450-600 mm apart and can run in either direction. Find the actual supports; do not assume their location.
Include brackets near both ends and the middle of the track, and supports at joins. For a heavy curtain over 5000 mm wide, use closer support spacing on the curtain stack side.
| Track width (mm) | Brackets |
|---|---|
| 100-1500 | 3 |
| 1501-2000 | 4 |
| 2001-3000 | 5 |
| 3001-4000 | 6 |
| 4001-5000 | 7 |
| 5001-5800 | 8 |
| 5801-6500 | 10 |
| 6501-7500 | 12 |
| 7501-8500 | 14 |
| 8501-10000 | 16 |
05 Joined manual tracks: support detail
At each join, fit two additional brackets on each side of the track joiner. Place the brackets at least 85 mm apart to accommodate the 85 mm joiner. These supports may miss the battens or studs, so use suitable fixings at those positions. Lay out the joined track before marking and keep the brackets clear of the joiner.
06 Ceiling fit: mark bracket positions
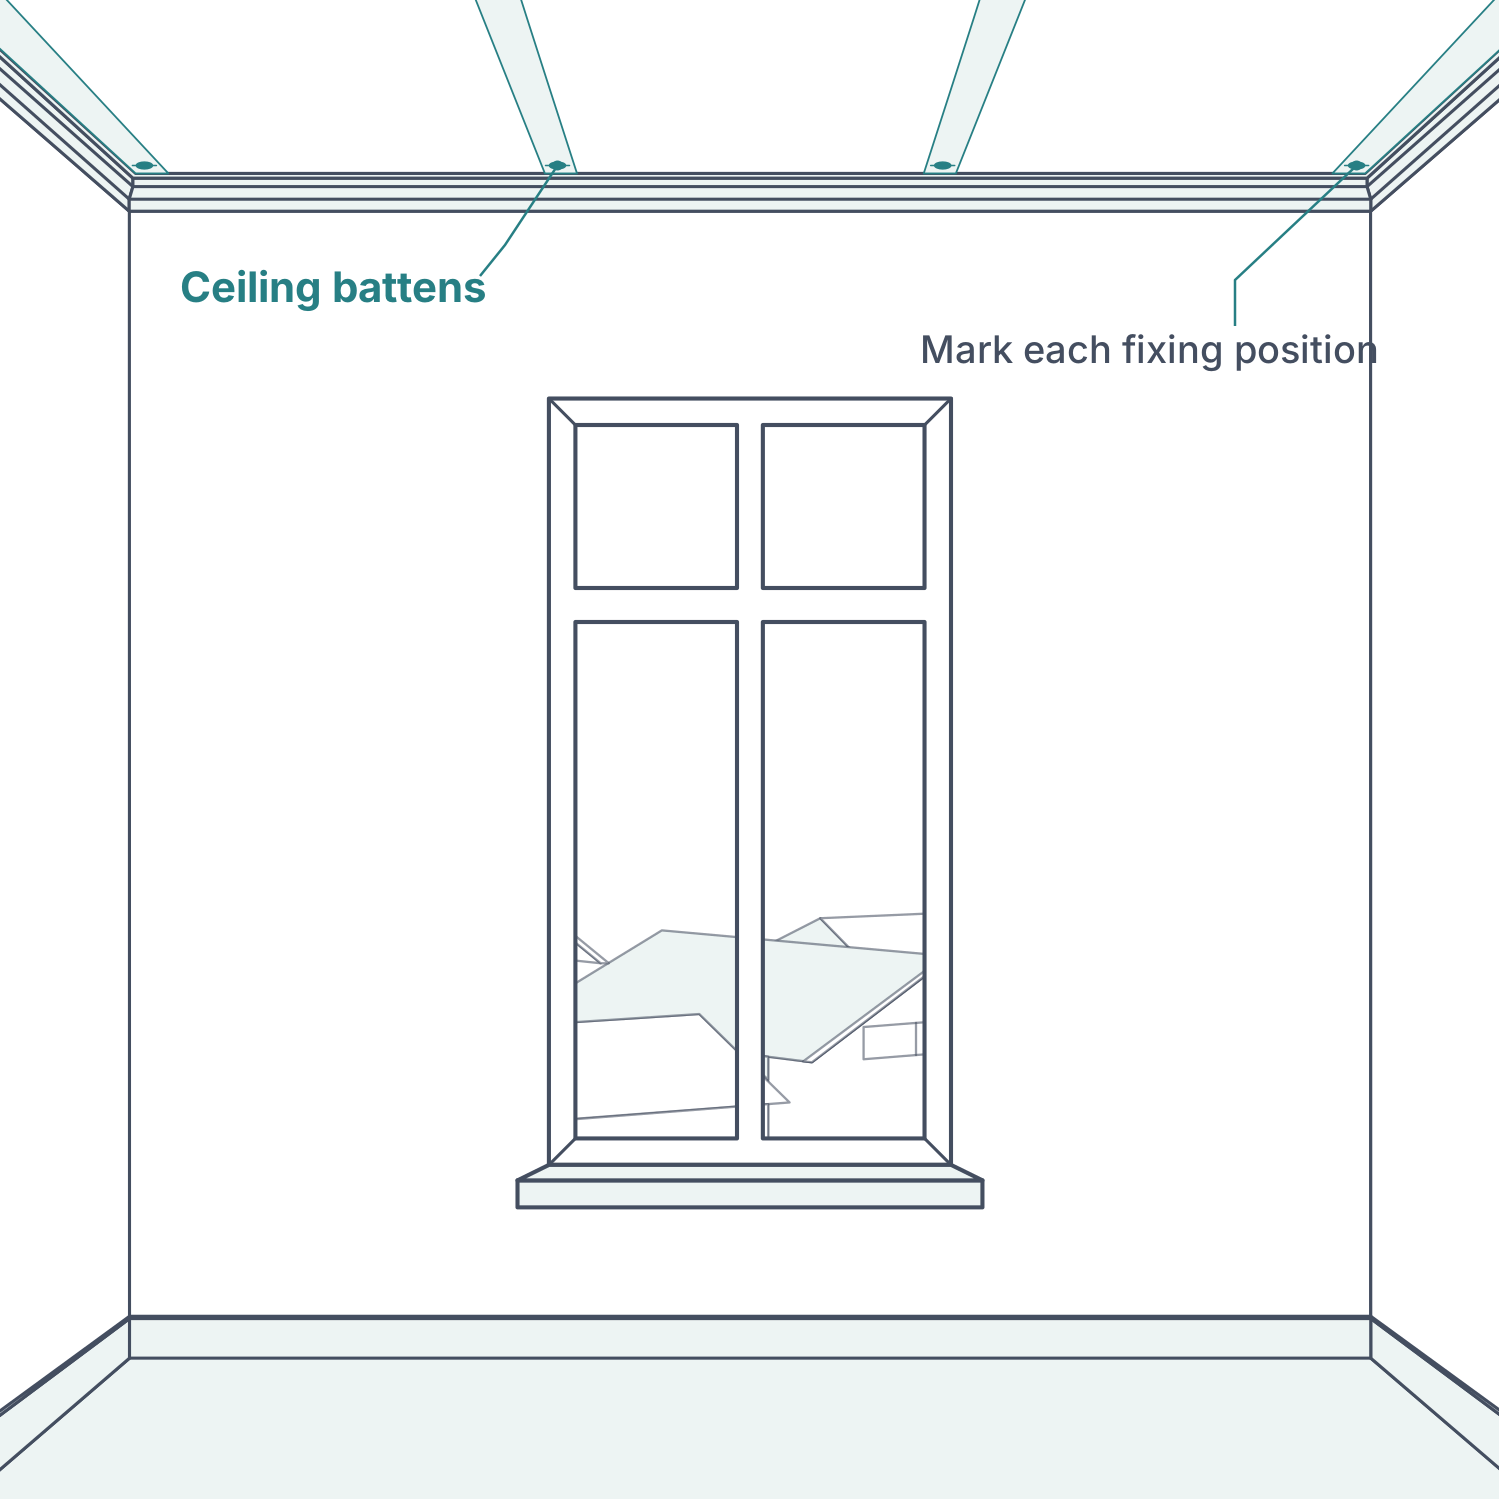
Locate the ceiling battens with a stud finder. Measure the bracket marks from the wall or the outermost protruding frame or roller blind, using the offsets below. For double curtains, make separate marks for the rear and front tracks.
Where battens cross the track, mark each suitable batten. Where a batten runs along the track, mark bracket positions along it using at least the stated clearance. Keep support at the ends, middle and joins. Use appropriate plaster anchors wherever a required position misses a batten. Masonry does not need the batten-location step.
Align the back of each ceiling bracket to its mark, then mark the screw holes. Put on protective eyewear and drill the timber pilot holes with a 3 mm bit; wood shavings indicate the timber support has been reached.
| Heading / fullness | Rear or single track | Front track, if double |
|---|---|---|
| S-Fold 200% | 35 mm | 145 mm |
| S-Fold 225% | 40 mm | 155 mm |
| S-Fold 250% | 45 mm | 165 mm |
| Pencil, pinch or inverted pleat | 35 mm | 145 mm |
07 Ceiling fit: fix brackets and clip in the track
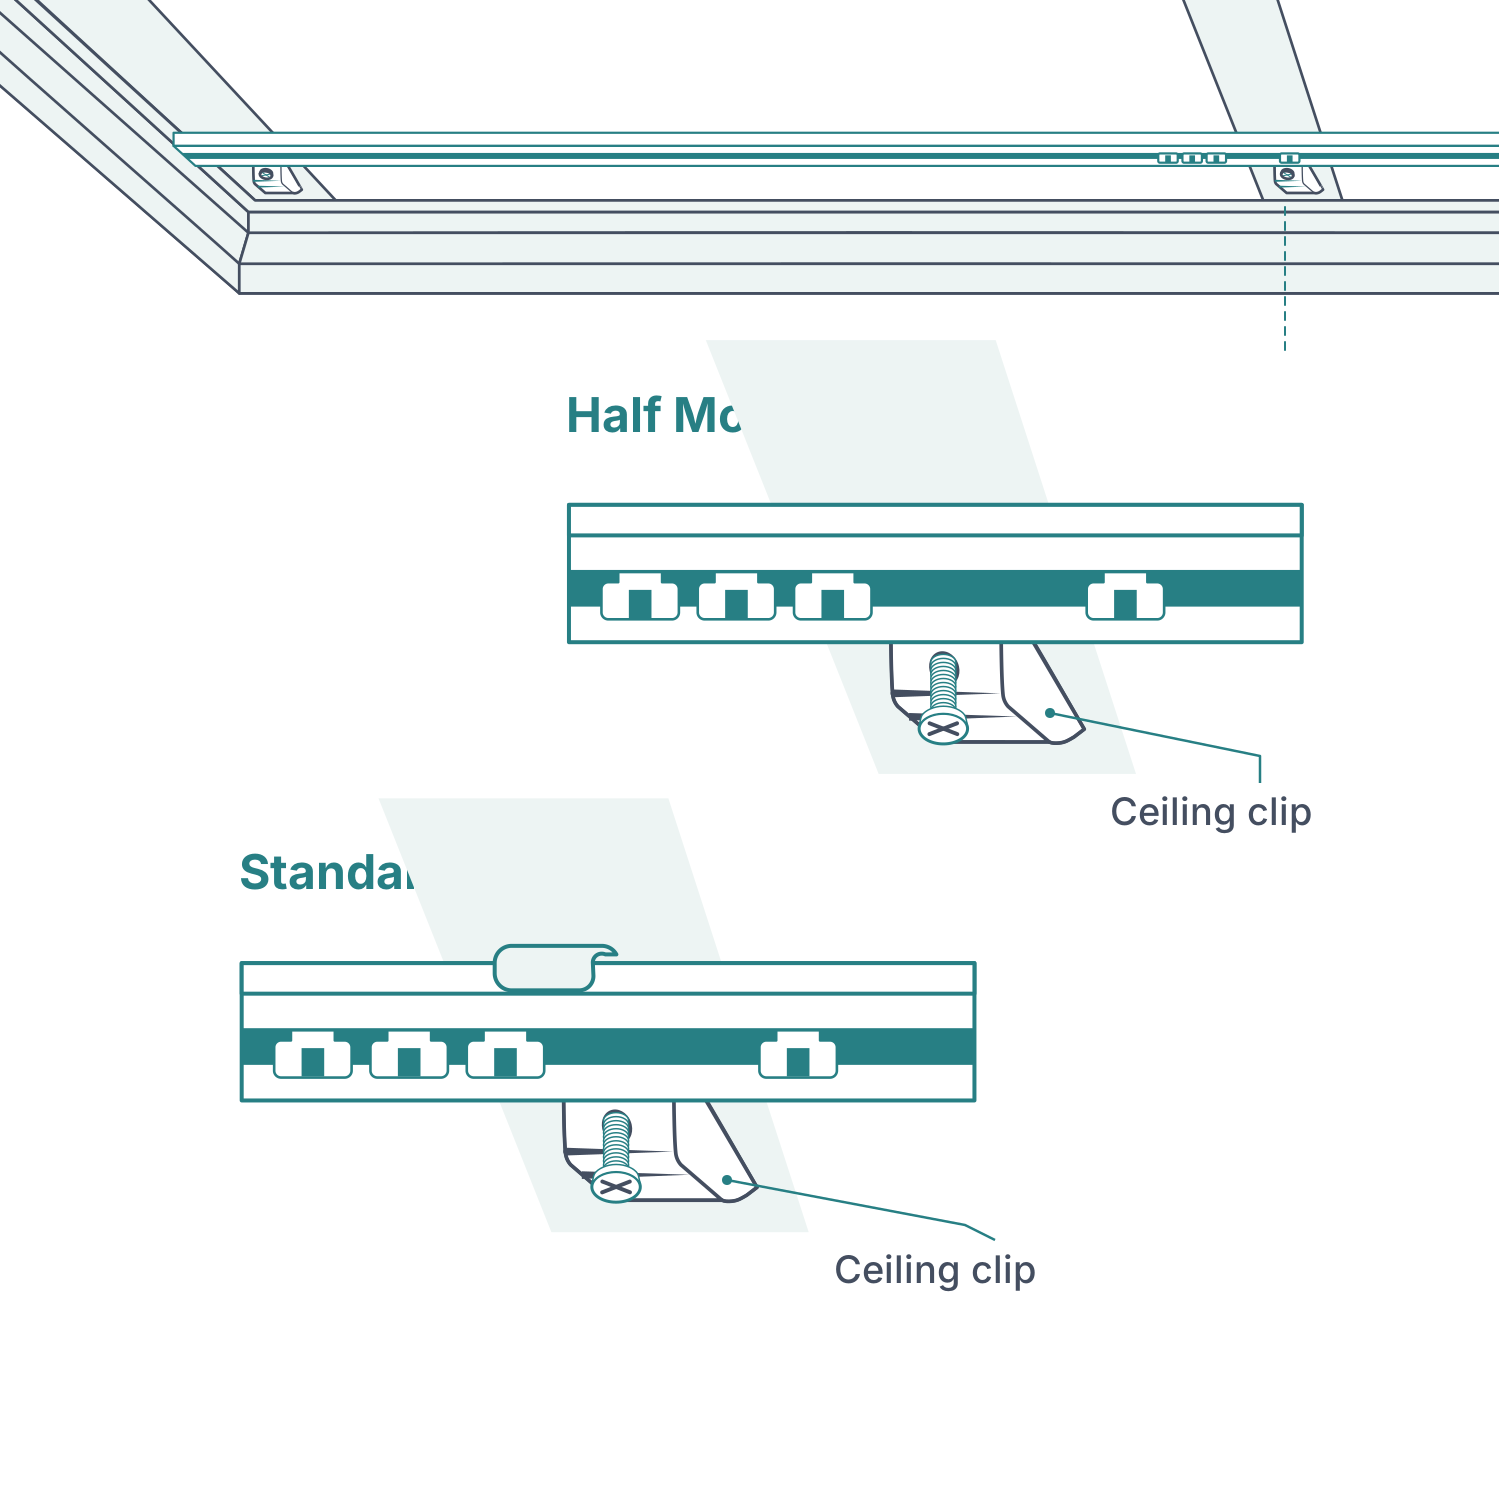
Partially secure the manual ceiling brackets, leaving them a little loose for track fitting. The screw must securely retain the bracket’s plastic piece and must not spin. Use the correct head size: gold screws for white ceiling brackets and black screws for black brackets. Motorised ceiling brackets use the supplied white button-stitch screws.
With a helper supporting the track, clip it into the middle bracket first and tighten that bracket. Engage the remaining brackets and tighten each fixing. Repeat for the other track on a double installation. Check each connection is secure.
Extra brackets for strength: add 2 extra brackets at every join in the track, one on each side of the join, and 2 at every corner, one on each side, so the track is strong enough.
08 Wall fit: locate supports and fix brackets
Use the recorded curtain drop to mark the installation height. Locate wall studs and mark the bracket positions on the supporting timber, keeping support at the ends and middle. For joined tracks, locate each piece and join before drilling. Use appropriate anchors where timber supports are unavailable.
Align each bracket arm with its mark, then mark the screw holes. Wear protective eyewear and predrill timber with a 3 mm bit. Secure the wall brackets firmly using the supplied timber screws, or the appropriate plaster/masonry fixings.
09 Wall fit: adjust and lock the track
Loosen the top screw of each bracket and set its attachment head to the required projection. Set every bracket to the same projection so the track runs straight, then tighten the screws.
Viewed facing the brackets on the wall, open the swivel arms underneath to the 2 o’clock position. Offer the track at an angle and hook its front groove onto the bracket’s front lip first. Bring the track flat onto the bracket.
While a helper holds the track, turn each swivel arm firmly to the 12 o’clock position so it grips the track groove. Check each bracket has locked.
10 Hang the curtain panels
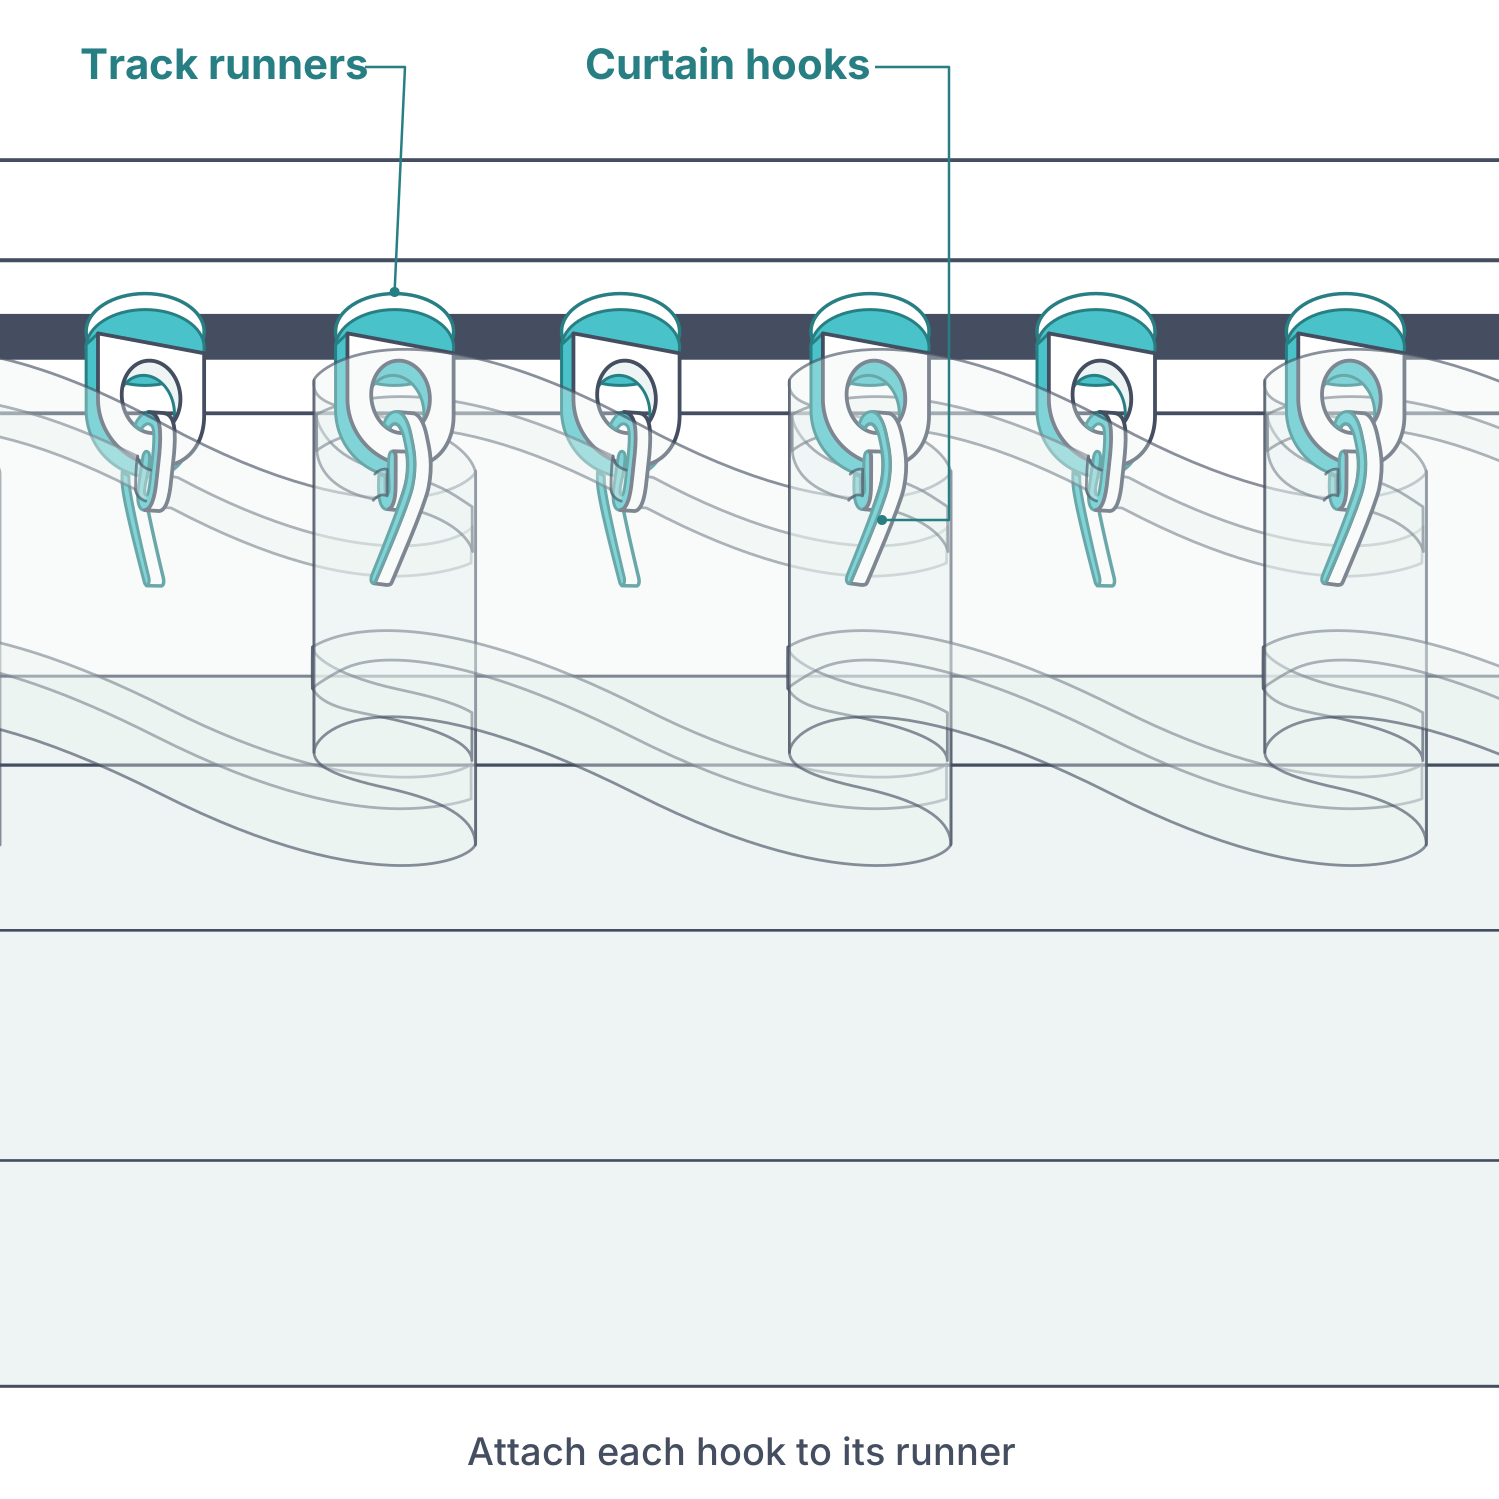
For manual S-Fold, check that every spaced pocket in the heading tape has its plastic hook. Replace missing hooks from the supplied spares at the marked spacing. Work from one end, hooking into every runner and alternating the fabric forwards and backwards to form an S.
For pencil, pinch and inverted pleats, insert every curtain hook into its track runner. Do not skip hooks. Motorised S-Fold uses studs already fitted to the tape, rather than the manual hooks: connect every stud to its corresponding runner.
On a double track, hang the rear curtain closest to the wall first, then the front curtain.
11 Dress and check the curtains
Arrange S-Fold headings into a continuous S shape. At both ends, turn the fabric back towards the wall to conceal the track. Work across the curtain, guiding each fold from the heading down to the hem so the folds align when drawn open.
If the folds lose their shape, guide them with your fingers from top to bottom. Check that all runners travel freely, each bracket is secure and no hook or stud has been missed.
12 Motorised tracks: fit before attaching the motor
Use at least two people. Leave the motor off the track while fitting it. If the track is joined, first follow the joining drawing for its exact S-Fold or pinch-pleat carrier system.
With the track on the floor, or held in its intended position by helpers, line up bracket locations with the ceiling battens or wall studs and mark those locations on top of the track.
Lower the track and insert its brackets. A rubber mallet may help seat the butterfly brackets at 90 degrees within the roof of the track. Check they are secure and square to it.
For wall fit, bolt the wall brackets to the butterfly brackets using the nuts and bolts. Lift the track with brackets attached, mark through the fixing holes, then secure into the battens/studs or suitable hollow-grip anchors where supports cannot be reached.
Hang the curtains before attaching the motor. Then follow the matching DC battery or AC hybrid motor programming manual, including its travel-limit procedure. Do not use roller-motor settings for a curtain motor.
PDF download
PDF download
PDF download
Installation help
Installation help: 1300 011 561 · contact@mydirectblinds.com.au
Edition 2 · 13 September 2026