
How to remove roller blinds (and put them back)
How to take down a roller blind safely, label it and put it back the right way round, with the installation guide to follow for your blind type.

To remove roller blinds, roll the blind up, support the tube with both hands, and release it from its brackets by following our installation guide for your blind in reverse. Look at both brackets before you pull and never force anything. The guide for your blind shows how the tube is seated at each end, so reversing it is the safest way to take the blind down and the way to put it back straight.
In short
- Roll the blind fully up, then support the tube with both hands. Ask someone to help with wide, heavy blinds.
- Look at both brackets first and follow the installation guide for your blind in reverse. Never force a bracket or lever the tube.
- Photograph and label the blind so it returns to the same window and the same way round.
- Cassette, fascia, linked, double and motorised blinds have their own guides. Contact us rather than force anything.
Before you take a roller blind down
A few minutes of preparation makes the job faster and stops the blind going back on the wrong way round.
- Set up safely. Use a stable step ladder rather than a chair, and clear the sill. Keep one hand on the blind at all times.
- Get a second person for wide blinds. Any blind wider than 2100 mm is made with a 50 mm tube and is heavier and awkward to hold level by yourself.
- Photograph everything. Take a picture of each bracket with the blind in place, of the chain or control end, and of how any chain safety device is fitted.
- Label the blind. Stick a piece of masking tape near the control end and write the window name from your order, or the room and window position, plus which side the chain is on.
- Note the roll direction. Lower the blind a little and see whether the fabric leaves the back of the tube (closer to the glass) or the front. That is the standard roll or the front roll.
- Plan for drying time. If you are taking the blind down to paint, allow the paint around the brackets to dry fully before you refit.
If you are removing the blind for cleaning, see how to clean roller blinds first, because most blinds do not need to come down.
Find the guide for your blind
Roller blinds are fitted in more than one way, so the first step is to open the installation guide that matches yours. Removal follows the same fitting order in reverse.
| Your blind | Guide to open |
|---|---|
| Standard single roller | Roller blinds installation guide |
| Full Blockout Cassette | Roller cassette installation guide |
| Blind with a fascia | Roller fascia installation guide |
| Linked roller blinds | Linked roller installation guide |
| Double roller blind | Double roller blinds installation guide |
| ZeroGravity cordless | ZeroGravity roller installation guide |
| Motorised roller | Motorised roller fitting guide |
If you cannot tell how a bracket holds the tube, stop and take a clear photo. Our guide to roller blind parts names each part you can see. Contact us and we will help, especially if the blind is still under warranty.
How to remove a roller blind
These are the general safety steps. The bracket release itself comes from the installation guide for your blind.
- Roll the blind fully up. With the fabric wound tightly, nothing can unroll as you lift it. Tuck the chain up out of the way so it cannot snag on the ladder or swing into your face.
- Position your ladder and helper. Stand where you can reach both brackets without leaning. A second person holds the end you are not working on.
- Take the weight. Slide one hand under the middle of the tube, or hold the control end if you are working alone.
- Release one end at a time. Reverse the fitting steps in the installation guide, keeping the tube supported. Our guide describes a spring-loaded pin at one end and clutch hooks at the other, so look closely at how each end sits before you start.
- Lower the blind and lay it down. Lay it flat on a bed, sofa or table, with the chain lying alongside, not underneath. Do not stand it on its base rail.
Tip: If an end will not release, do not pull harder or use a screwdriver as a lever. Paint around a bracket is a common cause. Check the photos you took, and contact us if it still will not move.
Blinds held by clips or covers
If your brackets have covers, or the tube will not lift out, something is still holding it. Side covers and bracket covers snap on over the brackets, and the installation guide shows them being fitted, so they come off first when you reverse the steps. Take the weight of the tube before you release anything, and never lift against resistance.
If you cannot work out what is holding the blind, photograph the bracket from the front and the top and send the photos to us. That is quicker than a damaged bracket or a torn fabric edge.
Special cases: cassette, fascia, linked, double and motorised
Standard roller blinds are the simplest. These need more care, and each has its own guide in the table above.
- Full Blockout Cassette: A cassette roller blind is a headbox with side channels and a bottom channel, made and matched to work together. Do not try to lift the blind out on its own. Follow the cassette guide, and contact us before loosening fixings.
- Blinds with a fascia: A fascia conceals the hardware and comes with matching brackets and side covers. Follow the fascia guide and do not force the covers.
- Linked blinds: Linked roller blinds share brackets at the joins, so support each blind fully and follow the linked guide before loosening any shared bracket.
- Double roller blinds: A double roller blind has two blinds on one set of dual brackets with different fabrics. Label the front and rear blinds as you take them down.
- Cordless blinds: ZeroGravity cordless blinds have their own spring arrangement, so use the ZeroGravity guide and keep the blind rolled up while it is out of the brackets.
- Motorised blinds: Take extra care at the motor end. A licensed electrician must connect or disconnect a hardwired motor, so do not touch the wiring. See our motorised roller blinds page for how motors are powered, and check the blind responds to its remote after you refit it.
How to put a roller blind back up
Refit the blind by following the installation guide for your blind from the start, with three checks that stop most mistakes.
- Check the brackets. Make sure they are firm, level and clean, and that paint has not blocked any slots or holes.
- Match the orientation. The chain (control) end goes on the same side as before, and the fabric must leave the tube on the same side. Compare with your photo. If in doubt, hold the blind up, pull the base rail down a few centimetres and check which way the fabric drops. Our guide to standard roll or reverse roll explains the difference.
- Refit any chain safety device exactly as it was supplied, using your photo and the installation guide.
- Test the blind. Lower it fully and raise it slowly. It should roll up straight, stop where you expect and clear handles and winders. If the fabric tracks sideways, the installation guide explains how to correct it.
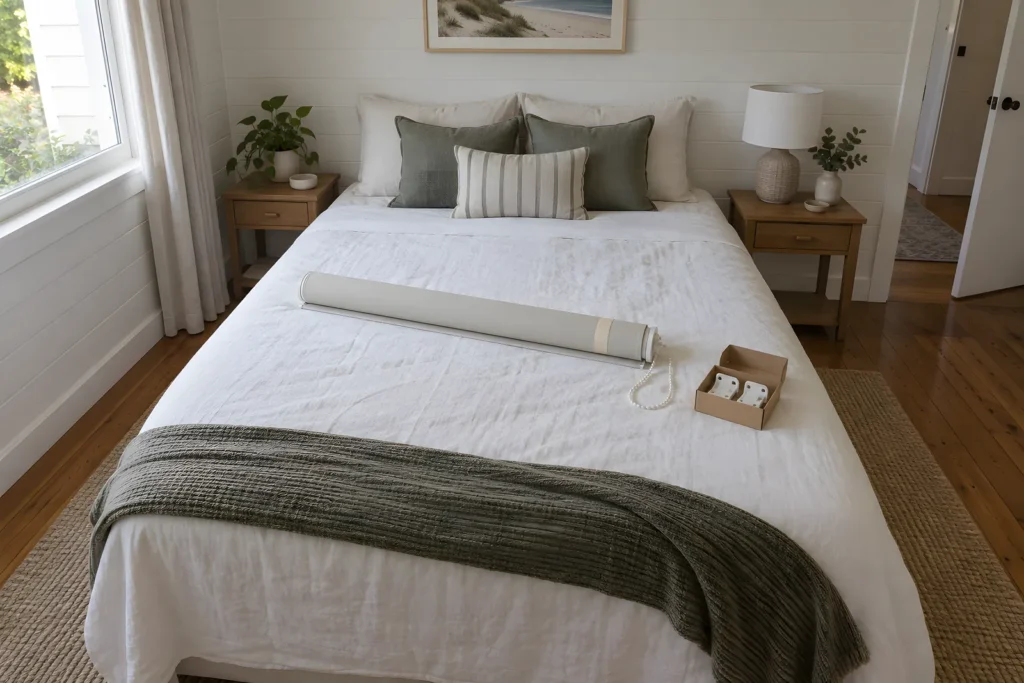
If the blind rolls crooked or the chain will not pull, see our guide to roller blind chain problems.
If the blind will not come off
| Problem | Likely cause | What to try |
|---|---|---|
| An end will not release | Paint around the bracket, or the guide's order was not reversed | Re-read the guide and look at your photos. Do not pry |
| The fabric starts to unroll when you release it | The blind was not rolled up fully | Hold the tube, re-roll the blind and try again |
| A bracket starts to pull from the wall | Loose or unsuitable fixings | Support the blind and stop. Contact us before refixing |
If none of these fits, stop and contact us with a photo of the bracket and your order details.
Removing the brackets too
Leave the brackets up unless you are painting behind them or replacing the blind. If you do take them off, mark each position lightly in pencil first, keep the screws in a labelled bag, and note which bracket sat on which side.
If you are replacing the blind, measure the window again rather than copying the old blind, using the roller blind measuring guide.
Questions
How do you take down a roller blind?
Roll it up fully, support the tube with both hands, then release it from its brackets by following the installation guide for your blind in reverse, one end at a time. Look at the brackets first and never force anything.
How do you unclip roller blinds?
Support the tube and check how your brackets hold it in the roller blind installation guide, then release one end at a time by reversing those steps. If something will not move, check for paint and look at your photos rather than forcing it.
Do I need to take the brackets off the wall as well?
Usually not. Leave the brackets up unless you are painting behind them or replacing the blind. If you do remove them, mark their position first.
Can I take down a motorised or cassette blind myself?
Take extra care at the motor end of a battery motor blind, and leave hardwired motors to a licensed electrician to disconnect. Cassette systems are one unit, so follow the installation guide and contact us before loosening fixings.
Why does my blind roll the wrong way after I refit it?
The blind has probably gone back turned around, or the control end is on the wrong side. Take it down and refit it so the chain end and the direction the fabric leaves the tube match your photos.
Replacing a roller blind?
Build a new roller blind to your measurements and see the price before you order.
Keep reading
 Care & cleaningHow to clean roller blinds without damaging the fabricThe safe, simple way to clean roller blinds while they hang: dust, damp sponge, dry. Includes what to avoid and how to handle grease, chains and brackets.
 Care & cleaningRoller blind chain problems and how to fix themChain slipped off, blind won't stay up or rolling crooked? A quick diagnosis table and safe step-by-step fixes, plus when to stop and contact us.
 ComparisonsStandard roll or reverse roll: which way should your blind roll?Standard (under) roll blocks more light and needs less depth. Reverse (front or over) roll hides the tube and clears handles. Here is how to choose.